Exploring the Suffolk Virginia Night Sky – Astronomy, Astrophotography, Telescopes, EAA – Planets and Stars and Nebula and Galaxies – Looking, Learning, Sharing… Let's see what we can see…
The Suffolk Sky
---------------
Exploring the Suffolk Virginia Night Sky
Astronomy, Astrophotography, EAA
Planets and Stars and Nebula and Galaxies
Looking, Learning, Sharing...
Let's see what we can see...
Weather Resistant Enclosure for the INDI-AllSky Camera
Recently I started tinkering with setting up an INDI AllSky Camera with a SVBONY SV305 and a Raspberry Pi 3B. It is a cool project and since I was able to get it working I wanted to enclose it to make it weather resistant. The camera has just been sitting out in the middle of the driveway and I have to bring it in when there is a threat of rain. I want to be able to just leave it out and let it capture. Here is what I put together to make my AllSky camera weather resistant.
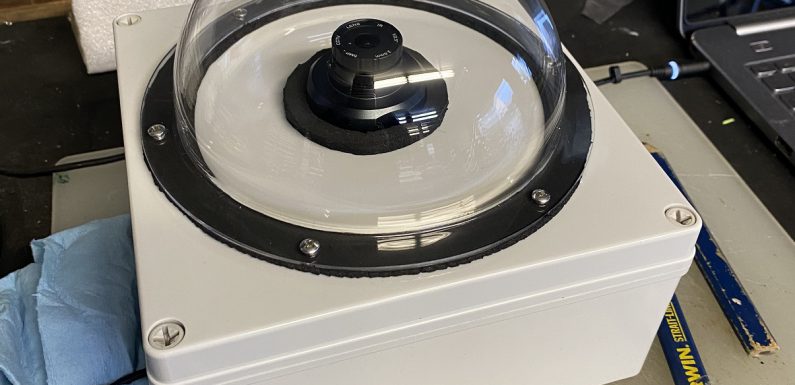
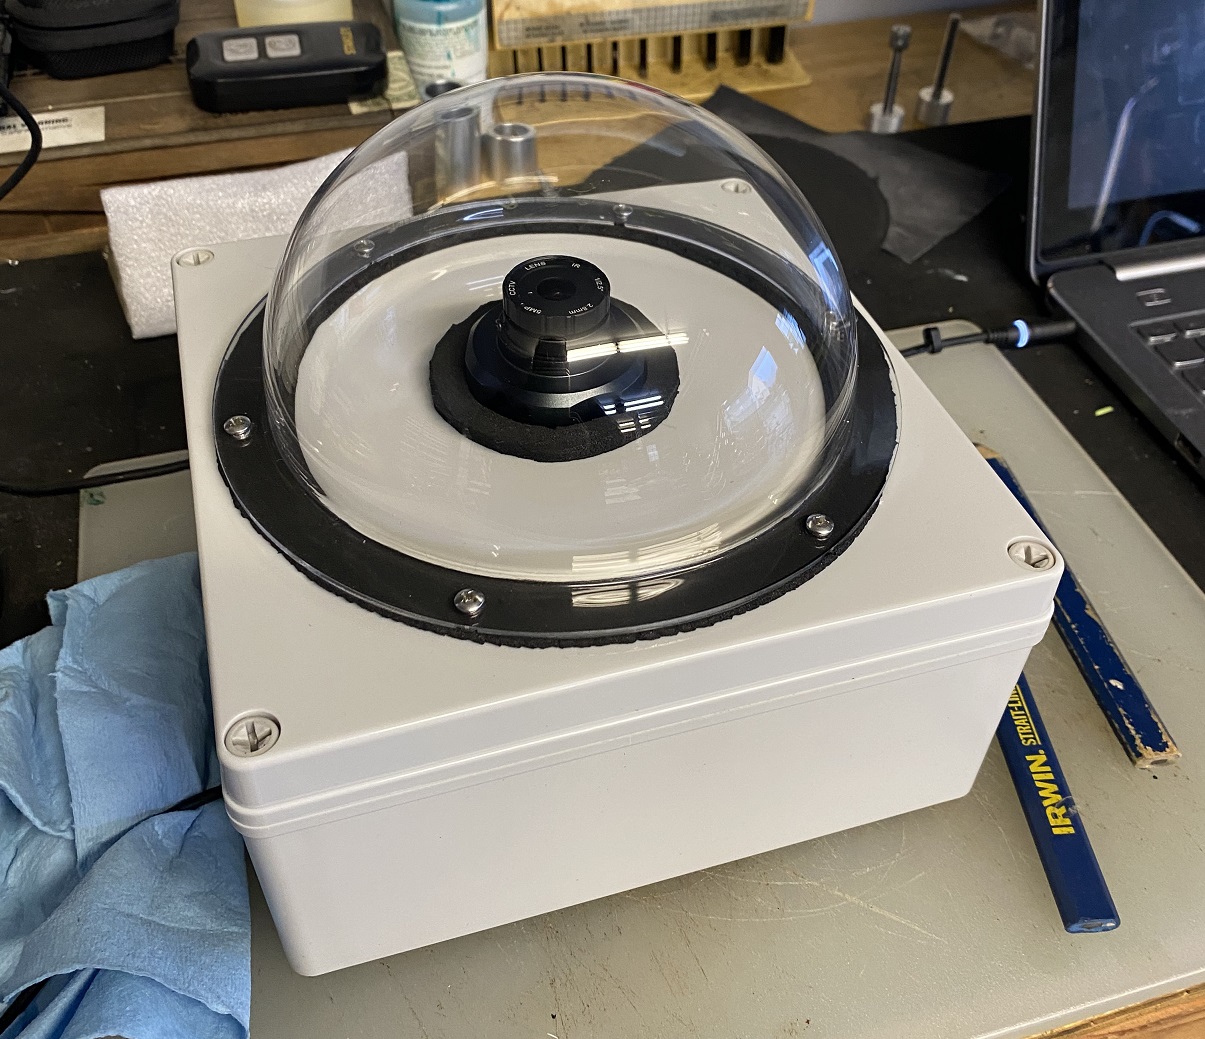
I picked up a 6″ acrylic dome on Amazon to cover the camera.
The dome has a 1/2″ flange around the outside with six holes so it can be easily mounted.
I also picked up an 8″x8″x4″ waterproof enclosure to house the Raspberry Pi.
I laid out, marked, and drilled the holes to attach the dome on the lid of the enclosure. I used a hole saw to drill out a 2″ hole in the center of the lid for the SV305 camera.
I made a gasket out of neoprene to go between the dome and the enclosure. Then attached the dome to the enclosure using #6-32 stainless steel machine bolts, washers, and nuts.
I modified the Raspberry Pi 4 case I had to fit the Raspberry Pi 3. Just had to trim off the separator for the dual HDMI connections on the Pi 4 to make it work for the Pi 3B. The Raspberry Pi 3B is in a case with a fan and I used adhesive velcro to secure it inside the enclosure. I drilled a 1/2″ hole in the center of the bottom of the enclosure for the Raspberry Pi power cable.
The first night out in the enclosure I had an issue with condensation on the outside of the dome. It was pretty humid out and it looks like it cleared up some as the night went on and the temperature equalized. If it is a problem over the next few nights I’ll probably add a USB dew heater strip to try to combat this.
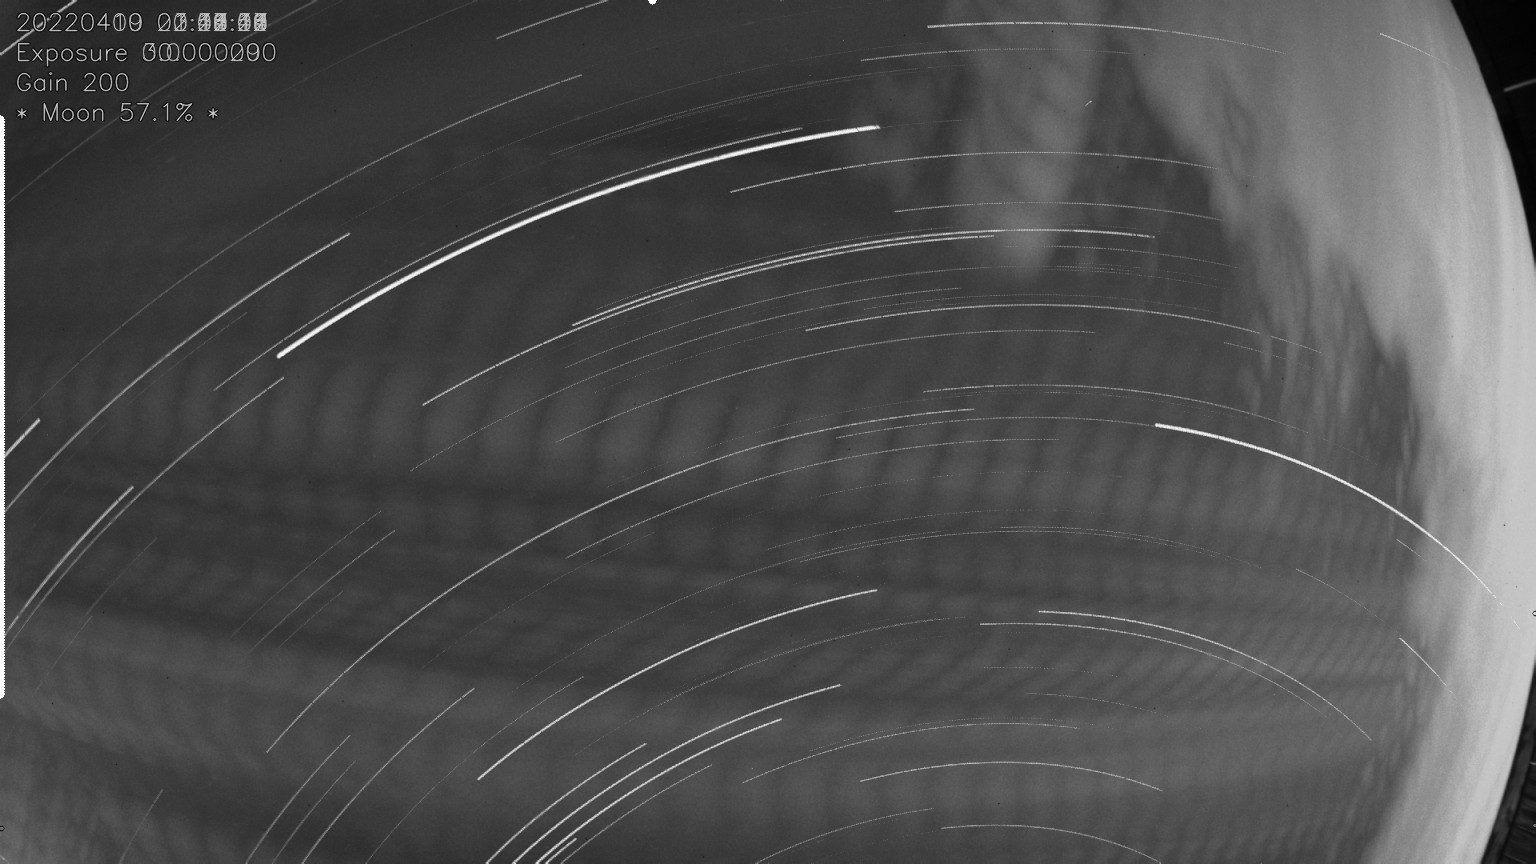
I have made a couple of changes to the indi-allsky settings. First my gain is now set to 110 for Day, 200 for Moon, and 300 for Night. So far this seems to work pretty well. I also turned on “Save in Grayscale” which has resulted in much cleaner images.
Here is the star trails capture from the second night out in the enclosure. It was pretty cloudy most of the night, but was clear from about 11 PM to 3 PM or so.
I need to figure out where the indi-allsky camera’s permanent home will be. Right now I have it set up in the middle of the driveway. I think I might figure out a way to mount it on top of the greenhouse. From there it will have a great view of the S/SW sky.