I have the SVBONY SV305 camera which I have not used much since I picked up the ZWO ASI294MC Pro. I also have a Raspberry Pi 3B which was just sitting idle. I decided to try to use the SV305, the Raspberry Pi 3B, and INDI-AllSky to set up an All Sky camera. This was a fun little project and I am looking forward to improving on it.
The SV305 does not come with a lens since it is meant to be used with a telescope. I picked up this inexpensive 2.8mm Wide Angle CCTV lens to try on the SV305.
The lens screws directly into the SV305. I used SharpCap in Live View mode to test and focus. I was worried I might have issues with focus, but the 2.8mm lens focused just fine.

Installing INDI-AllSky on the Raspberry Pi 3B
I imaged a 32 GB SD Card with the Raspberry Pi OS (32-bit) using the Raspberry Pi Imager. INDI All Sky recommends at least a 64 GB of available space to store 2 months of videos and 30 days of JPEG images, but the 32 GB card is what I have and should be fine for testing. Once I get everything worked out and tested I’ll get a 128 GB SD Card and rebuild.
Ran raspi-conf to set the hostname, turn on SSH, and turn on VNC.
Increased the swapfile size to 2 GB by editing /etc/dphys-swapfile and setting CONF_SWAPSIZE=2048. Then swapoff, setup, and swapon using the following commands:
sudo dphys-swapfile swapoff

sudo dphys-swapfile setup

sudo dphys-swapfile swapon
Followed the instructions in the INDI-AllSky Readme, the installation process is well documented.
Install git and clone the indi-allsky repository:
sudo apt install git

git clone https://github.com/aaronwmorris/indi-allsky.git
The first time I ran the ~/indi-allsky/setup.sh and it prompted me to build indi using ~/misc/build_indi.sh
cd indi-allsky

./setup.sh

./misc/build_indi.sh
At first I had an issue with getting indi to build. When it got to the “TASK [build_indi : Build indi_core]” it would consume all the resources on the Raspberry Pi 3B and make the Pi completely unusable. The “Build indi_core” part of the installation is consuming all the resources. It would get to a point where everything would just grind to a halt. I thought if I just let it go it would finish up and return to normal, this was not the case. I let it run over night and it never completed or recovered.
To fix this I edited the file ~/indi-allsky/ansible/roles/build_indi/defaults/main.yml and changed the configuration for parallel processes to the following:
parallel_processes: '2'
The Raspberry Pi3B has a four core processor and 1 GB of memory, setting parallel processes to 2 keeps the build_indi processes from consuming all 4 cores and completely overwhelming the Raspberry Pi. After setting the parallel processes configuration I re-ran the ~/misc/build_indi.sh. It did take a while, around 1 1/2 hours, to build_indi and the 3rd party drivers. I kicked it off, waited till it prompted me for the “BECOME” password (this is your user password you use to sudo), went a did some other stuff, and it completed successfully.
After build_indi completed I ran ./setup.sh again to complete the INDI-AllSky installation. It will prompt you for your locale and timezone then start setting up indi-allsky. During the setup it will ask you for which indi driver you will be using, I selected the one for the SVBONY SV305. The setup also took a while to complete, but I did not time it.
After setup completed successfully I started the AllSky services:
systemctl --user start indiserver

systemctl --user start indi-allsky
From the Raspberry Pi desktop I connected to https://localhost/indi-allsky/, entered the username “admin” and password “secret” and… magic 🙂
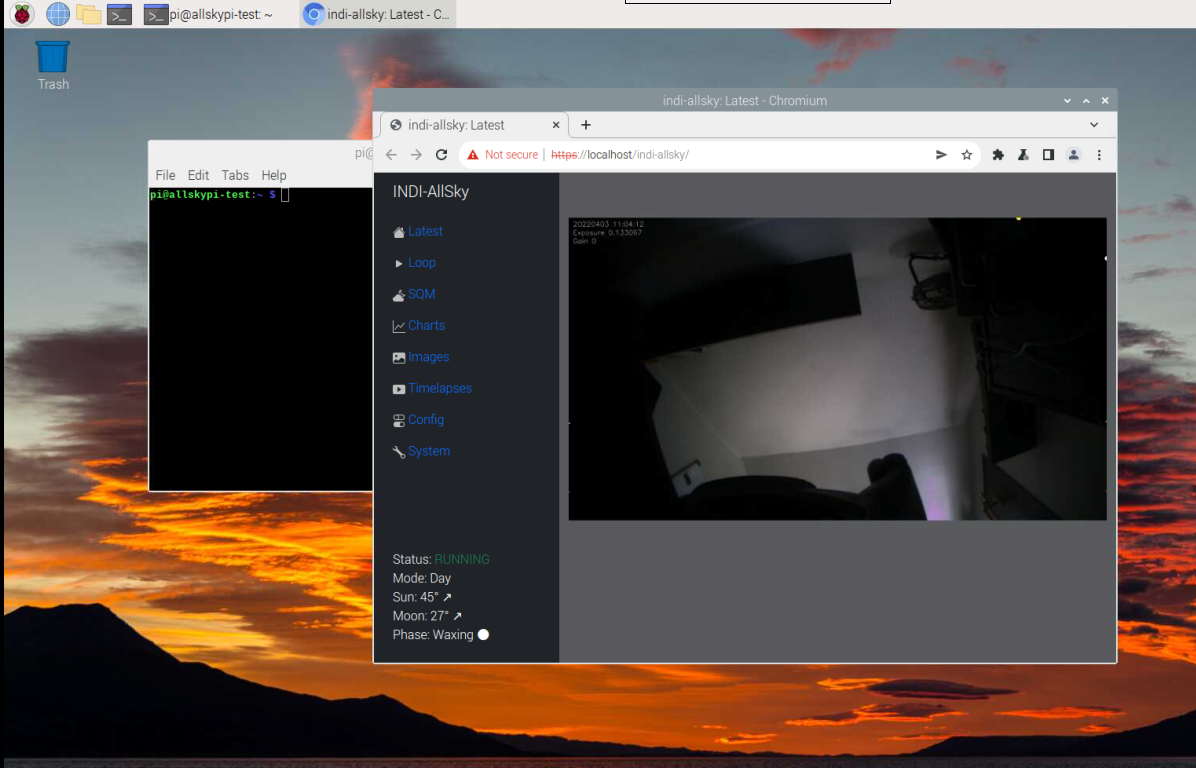
The ceiling in my office 🙂
Taking Darks
Stop indi-allsky and cover the camera lens. From a terminal window run the following to capture darks:
systemctl --user stop indi-allsky

cd indi-allsky

source virtualenv/indi-allsky/bin/activate

./allsky.py darks

systemctl --user start indi-allsky
Darks will be taken for different exposure lengths (up to the configured max) for your Nighttime, Moon Mode, and Daytime Gain settings.
My current gain settings are 250 for Nighttime, 200 for Moon Mode, and 110 for Daytime. I will probably adjust these as I test things but this is where I am starting out.
Anytime you make changes to the gain settings you will need to reshoot darks. With the max exposure time set at 30 seconds it takes about 10 minutes to capture darks.
First Light
Set up the SV305 camera and the Raspberry Pi running indi-allsky in the drive way and let it run over night.
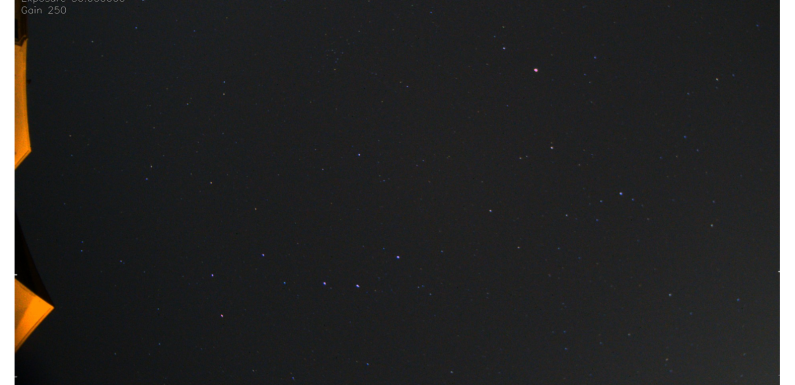
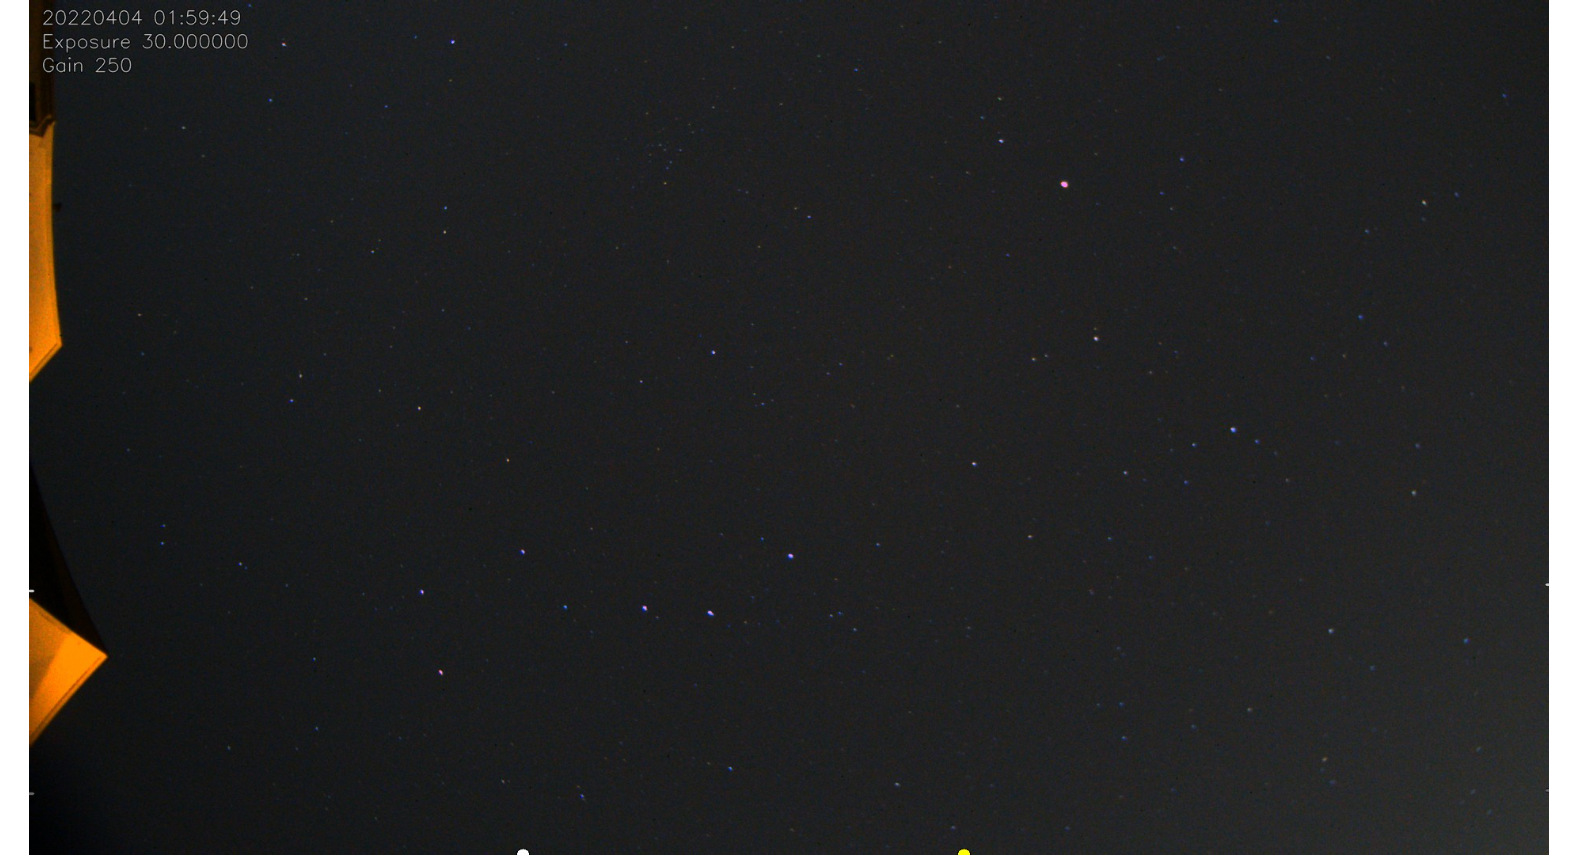
Here is a capture from around 2 AM on 4/4/2022. You can see the Big Dipper in the lower part of the frame!
I submitted the above capture to Astrometry.com to see if it would plate solve and… IT DID! Here is the annotated overlay it generated:
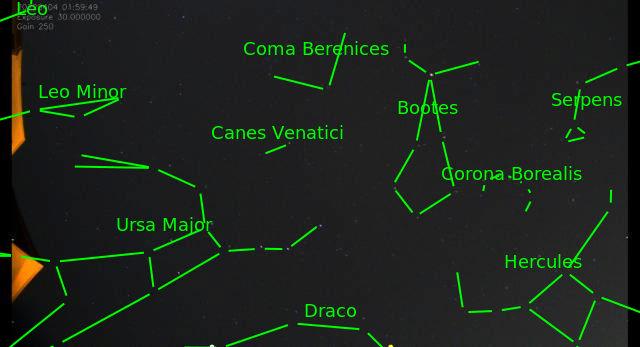
That is kind of cool if you ask me 🙂 I am getting approximately a 110 degree x 60 degree view of the sky.
Unfortunately the Time Lapse and Star Trails did not generate… not sure why, but I’ll dig into it a bit when I get a chance.
What’s Next…
I am going to have a lot of fun with this for sure.
I need to figure out what the problem is with the Time Lapse and Star Trails. Going to get a 128 GB SD card for the Pi and rebuild indi-allsky. I plan to build a weatherproof enclosure for the camera and Pi so I can keep it outside. Experiment with camera settings (gain, etc) to get the best captures.
Going to keep playing with the SVBONY SV305 camera but I may have to upgrade the camera at some point 🙂 I’ll probably look at getting some different lens to tinker with. I think this 2.1 mm 150 degree ZWO lens will be worth a try.
INDI-AllSky should work with any INDI compatible camera. If you have a camera and a Raspberry Pi it is definitely a neat little project.
Any questions or tips please submit a comment.
Stay tuned for more…


