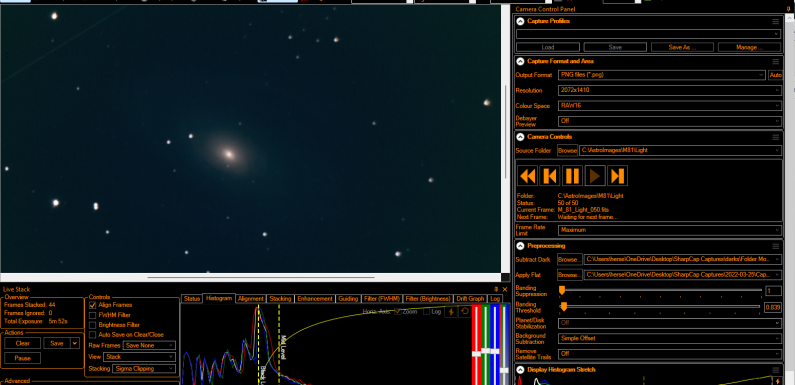
I have had a few folks reach out and ask me about my workflow for capturing images with KStars/Ekos/INDI and then live stacking them using SharpCap for EAA. I am using Ekos to capture and save the FITS files to my local PC through INDI running on a Raspberry Pi, then I use the Folder Monitor Camera in SharpCap Pro to live stack the captured frames. This does require the SharpCap Pro license which is under $20 a year. The SharpCap Pro license is well worth the money (IMHO) for all the features it provides, including applying darks, applying flats, and of course the Folder Monitor Camera. In this post I’ll try to detail how I capture images with Ekos and live stack them using SharpCap.
Here is an overview of my EAA live stacking workflow with KStars/Ekos and SharpCap Pro:
- Setup gear, connect mount and cameras to the Astroberry Raspberry Pi, focus, and polar align.
- Head up to my office Windows PC.
- Launch KStars/Ekos and start the INDI Profile and verify connections.
- Create a folder structure on my PC to save Ekos Captures.
- Launch SharpCap and Start the Folder Monitor Camera.
- In SharpCap select the Folder for the Folder Monitor Camera and start the live stack.
- In KStars slew to my target and check framing.
- Configure Ekos to Capture Light Frames and save them in the correct folder path.
- Start the capture run in Ekos and SharpCap will live stack the images as they are saved in the monitored folder.
- Enjoy the views.
For my set up I have a Raspberry Pi running Astroberry which is connected to my mount and cameras. I run KStars with Ekos on my desktop Windows PC which connects to the indiserver running on the Raspberry Pi to interface with the mount and cameras. This allows me to control the mount and cameras with KStars/Ekos on my Windows PC over my wireless network.
Once I have all my gear setup, mount and cameras connected to the Raspberry Pi running Astroberry, focused, and polar aligned I move inside to my office. If I am capturing darks and flats there is some back and forth between the office and scope, I’ll cover how I capture darks and flats in a future blog post. On my Windows PC I launch KStars/Ekos and start the Ekos Profile to connect things up through the INDI Server running on the Raspberry Pi.
On the Windows PC I create a folder structure for the object I am going to image. Typically I create the folder for the object, for example M81, and then a subfolder with in that folder called Light (this is where Ekos is going to save the captured Light FITS).
![]()
In this example C:\AstroImages\M81 will be the path I am going to setup in Ekos. Ekos automatically adds the Light subfolder to the capture path when capturing Light frames.
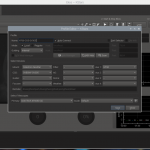
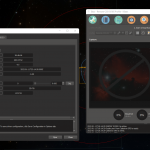
I launch SharpCap and select the Folder Monitor Camera from the Cameras menu. Then in the Camera Control section I browse to the full path I created above, C:\AstroImages\M81\Light, and select the “All Images in Selected Folder” button.

Since I have not started capturing images yet the folder is empty and the Folder Monitor Status is showing 0 of 0. Next Frame is showing “Waiting for the next frame…”
I enter the Target Name and select Live Stack.

SharpCap is now ready to start live stacking images received from the Folder Monitor Camera.
Now in KStars I select the object (M81 in this case) I am going to capture and slew to it. Then I plate solve and sync to make sure I am on target. I open the Ekos capture module and configure my capture run. I set the exposure time, the number of exposures to take, camera cooling/temperature, binning, gain, etc. I also set the path where I want the captures to be stored.
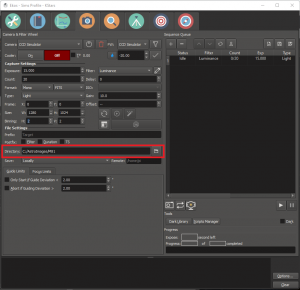
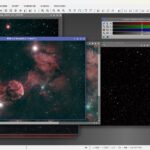
I usually take a single image capture and view it in the KStars FITS viewer just to make sure I am good with the settings and framing. Then I start the capture run. Ekos starts capturing images and places them in the Light subfolder in the configured path (C:\AstroImages\M81). The SharpCap Folder Monitor Camera is monitoring this folder (C:\AstroImages\M81\Light) and when the new image file is added SharpCap processes it into the live stack. As the image stacks I can adjust the histogram, plate-solve and annotate, or apply other SharpCap Pro processing.
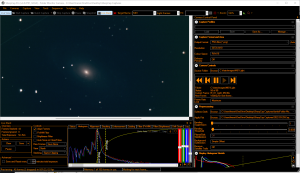
That is my process for using my Astroberry Raspberry Pi with INDI Server, KStars/Ekos/Indi, and SharpCap Pro to live stack my EAA captures. This work flow works well for me and it is easy to repeat as I observe different objects during an EAA session.
Check out these other post for more information on my Astroberry Raspberry Pi setup:
- Setting up a Raspberry Pi for EAA
- Remote EAA with Astroberry Web Manager
- Setting up a GPS Module on Astroberry
- Added a Display to the Astroberry Raspberry Pi
I’ll get a write up done on how I capture flats and darks using a similar method as above in the near future.
Hope you found this helpful and that it answers the questions a few folks had. This process works well for me, but there are probably other, maybe better, ways to accomplish the same results. If you have any questions, tips, or a different process please post them in the comments below.


This looks like something I could do using my new mount iOptron HAE69 . It has iMate built in that loads Kstars and Ekos. I have to learn how to set those up. I know SharpCap fairly well though. I think your work flow for live stacking could work for me. How may I contact you if I have further questions regarding this set up and use?
You can just hit me up here any time. I monitor the comments fairly regularly. I am also on Cloudynights.com user herseycart
Happy to help you work through it.
Hersey
Thank you. While looking in to the site I ran in to Norvin and he gave me some good information. I’m still lost but closer.