Exploring the Suffolk Virginia Night Sky – Astronomy, Astrophotography, Telescopes, EAA – Planets and Stars and Nebula and Galaxies – Looking, Learning, Sharing… Let's see what we can see…
I have been wanting to test some other methods of connecting my to astronomy gear for EAA observing. My Astroberry Raspberry Pi is working great but just want to do some tinkering. Since the Pi I built with Astroberry is working great I don’t want to use it for testing, so I picked up a new Raspberry Pi. Raspberry Pis have been pretty hard to come by lately, and the ones you can find have the price over inflated. I came across a 2 GB Pi Kit at PiShop.us which was in-stock and the price was pretty fair.
This post is from my build notes and outlines how I installed the Raspberry Pi OS and some of the initial configurations. It also walks through how I built indi and the 3rd party drivers from the sources, installed indiwebmanager, and setup VirtualHere for USB over IP.
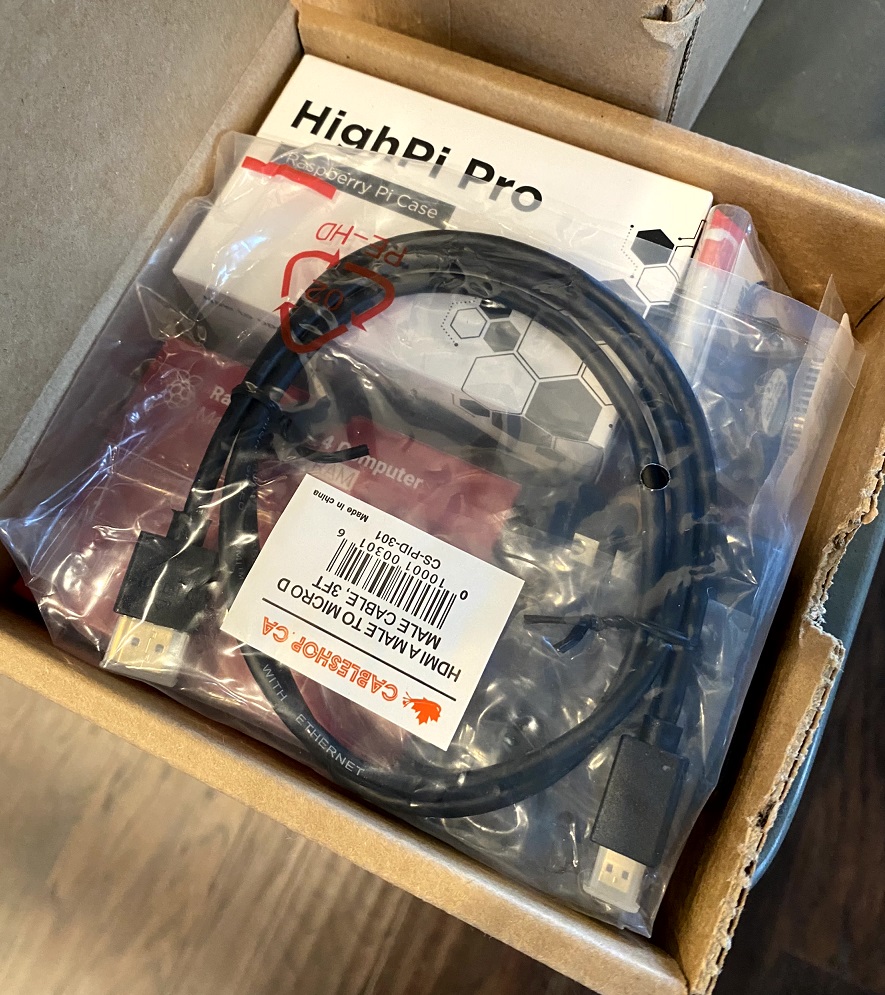
I ordered the kit the Thursday before Christmas and it arrived on Saturday (Christmas Eve). It’s a nice kit which includes the Raspberry Pi 4B 2G, 32 GB SD Card, power supply, HDMI cable, heat sinks, fan, and a nice case. I actually really like the HiPi case included in the kit.
Initial Raspberry Pi Setup
Installed the Raspberry Pi OS (32-bit) on the SD card using the Raspberry Pi Imager. Installed the SD Card in the Raspberry Pi and booted it up. Ran through the initial setup (locale, timezone, Wifi setup, etc). It tries to install updates during the initial setup, but for some reason that failed. I was able to update it manually after the initial setup.
sudo apt update

sudo apt upgrade
I set the hostname to hubble2 and then created DHCP reservations for it on my Wifi and LAN network. I enabled SSH and VNC. I could probably disable the GUI desktop, but sometimes I like using the desktop over VNC as opposed to just an SSH terminal window.
Tweaks and Optimizations
Couple of minor tweaks and optimizations which I apply to my most of Raspberry Pi OS builds:
Increase swap to 2048 MB
Edit /etc/dphys-swapfile and change the swap size with this setting CONF_SWAPSIZE=2048. Then swapoff, setup, and swapon using the following commands:
sudo dphys-swapfile swapoff

sudo dphys-swapfile setup

sudo dphys-swapfile swapon
Decrease swappiness.
This should save some wear on the SD card by not swapping as aggressively (at least that is how I understand it).
echo "vm.swappiness = 1" | sudo tee /etc/sysctl.d/90-swappiness.conf

sudo sysctl --system
Building INDI from Source
I want to be able to run indiserver on it to connect up to my gear in way that I am familiar with so I am building indi and the drivers I need from source.
indi (indi-core/indiserver) https://github.com/indilib/indi
Pretty simple process, just follow the direction in the README.md. Use apt to install the dependencies per the README (basically just cut and paste the code from the dependencies section of the README). Then I used cmake to build indi:
mkdir -p ~/Projects

cd ~/Projects

git clone --depth 1 https://github.com/indilib/indi.git

mkdir -p ~/Projects/build/indi-core

cd ~/Projects/build/indi-core

cmake -DCMAKE_INSTALL_PREFIX=/usr -DCMAKE_BUILD_TYPE=Debug ~/Projects/indi

make -j4

sudo make install
Building INDI 3rd Party Libraries and Drivers from Source
indi-3rdparty https://github.com/indilib/indi-3rdparty
indi-core includes the Celestron drivers but the ZWO Camera, ZWO EAF, the OSSAG, and GPSD required 3rd party drivers which need to be built and installed individually.
Install the dependencies from the README.
The process for building the libraries and drivers is pretty much the same for each driver. First change to the Projects directory and clone the repository.
cd ~/Projects

git clone --depth=1 https://github.com/indilib/indi-3rdparty
Then build and install the library or driver. (Replace DRIVERORLIBRARY with the name of the driver or library, for example libasi or indi-asi)
mkdir -p ~/Projects/build/DRIVERORLIBRARY

cd ~/Projects/build/DRIVERORLIBRARY

cmake -DCMAKE_INSTALL_PREFIX=/usr -DCMAKE_BUILD_TYPE=Debug ~/Projects/indi-3rdparty/DRIVERORLIBRARY

make -j4

sudo make install
The library and driver for the ZWO camera and EAF. This also has the driver for the ZWO EFW (someday, someday soon).
– libasi
– indi-asi
I did have some issues with getting the indi-asi to build. I think what ended up working was I installed the ZWO SDKs for the Camera and the EAF, then rebuilt indi-core, then built libasi, and finally indi-asi. I stumbled across this write up on setting up the ZWO drivers while searching for a solution. It pointed me in the direction of installing the SDK. Sorry I did not document the process better, but I think this is what worked (since I was able to successfully build libasi and indi-asi). When I build it again I’ll take better notes.
This library and driver supports the Orion Star Shooter Autguider (OSSAG)
– libqhy
– indi-qhy
This is the driver for GPSD.
– indi-gpsd
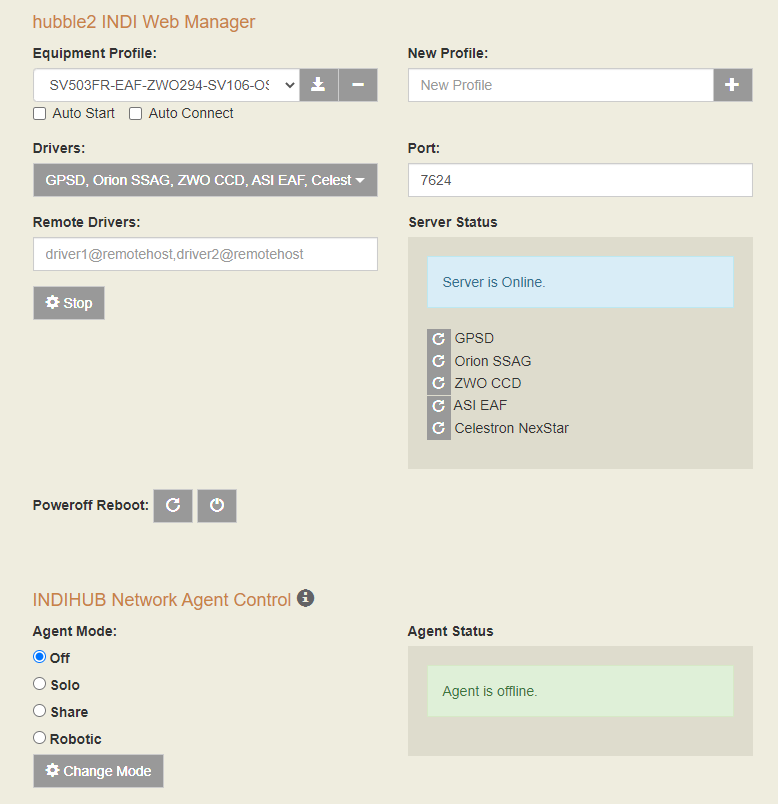
Installing INDI Web Manager
indiwebmanager https://github.com/knro/indiwebmanager
This provides a nice web interface to create profiles, start, and stop, the indiserver. It is very easy to install:
sudo pip install indiweb
Then configure Systemd so the indiwebmanager starts on boot.
I created a Profile with my drivers and tested connecting it up to the gear. Had some issues initially with gpsd grabbing the mounts USB connection, but worked through that (set USBAUTO=”false” in /etc/default/gpsd). Everything connected up through KStars/Ekos as it should.
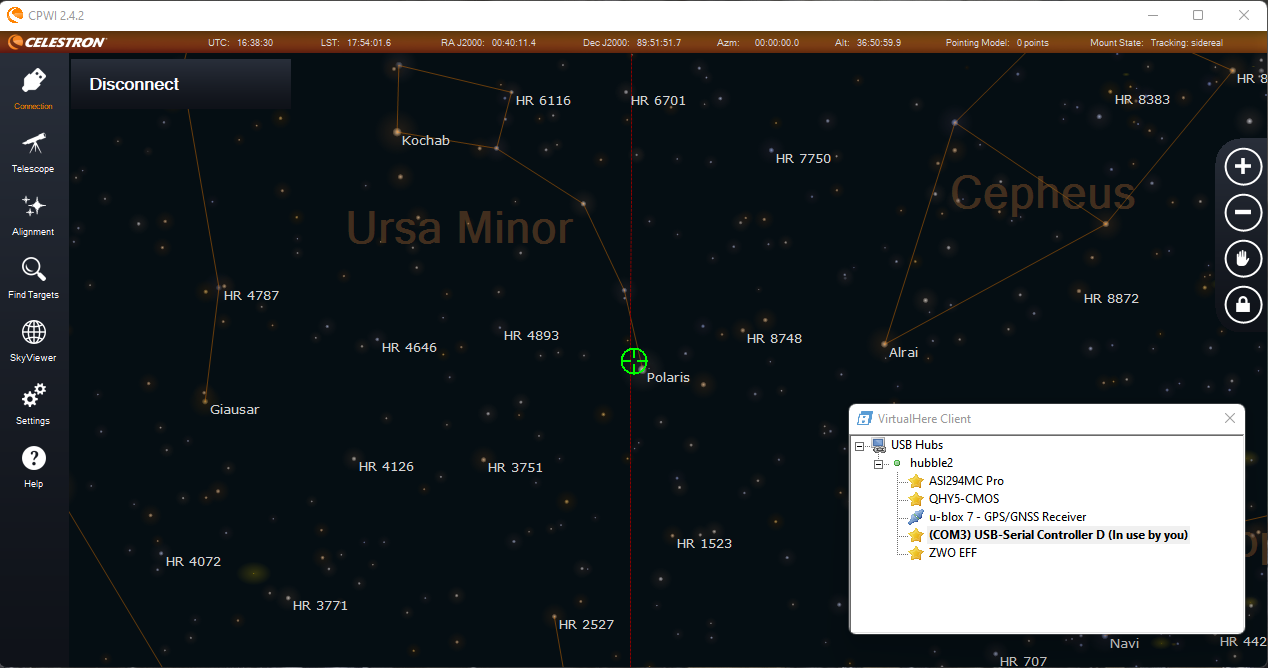
USB over IP with VirtualHere
I want to do some USB over IP testing to interface the camera directly with SharpCap. This should make shooting flats and darks a bit easier. I installed VirtualHere on the Raspberry Pi to try it out. Installed the Client on my desktop in the office and I can connect to USB connected device on the Raspberry Pi as if they were connect locally.
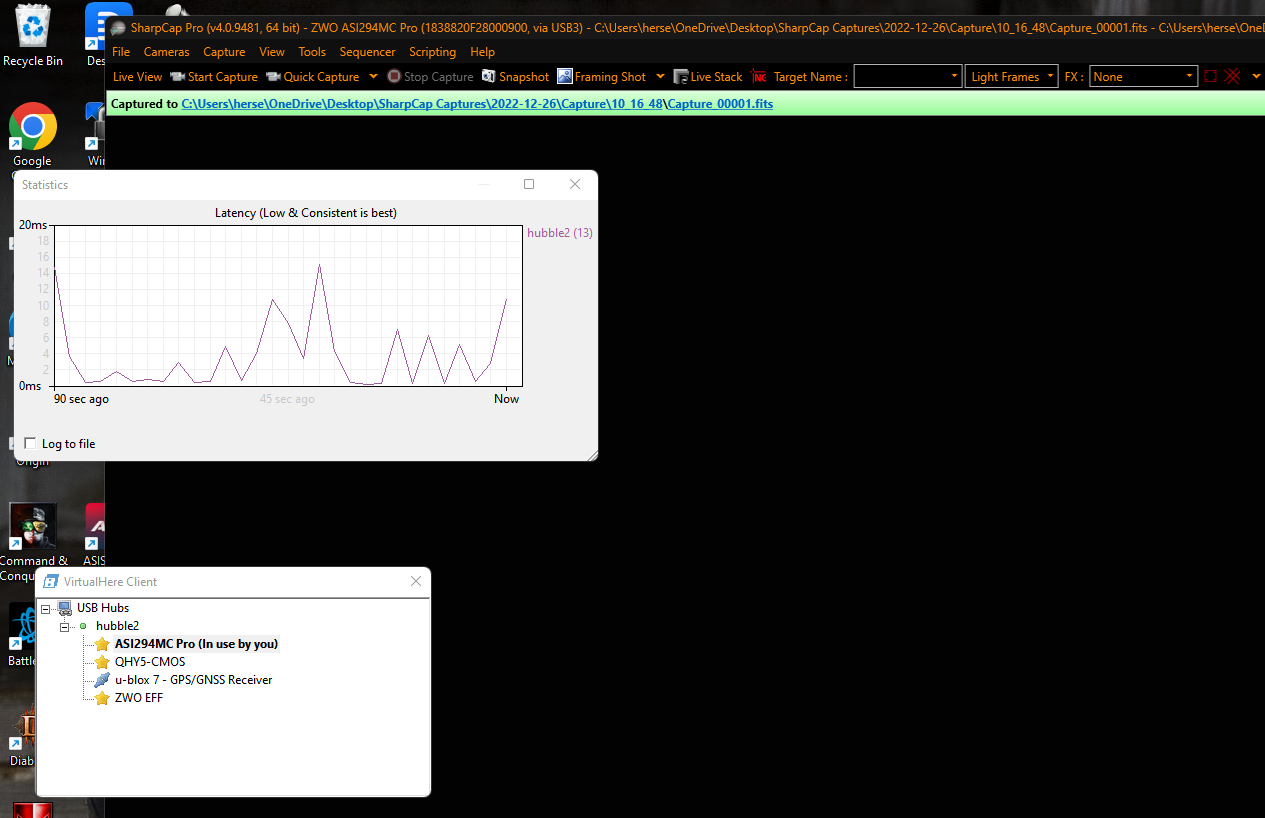
For my initial testing this worked fine over Wifi for the mount control, but not for capturing images. I could connect the camera to SharpCap and adjust the settings but there was just too much latency when transferring images and it would time out.
I ran a ethernet cable out the window and out to the scope. Over ethernet VirtualHere worked fine and I was able to connect the camera directly to SharpCap Pro and captured a couple sets of darks. Transfer times without binning were < 1s per frame over the ethernet connection.
Since I was able to get this to work I purchased a license so I can connect multiple USB devices over IP. After licensing I reinstalled VirtualHere with the 32-bit ARM Raspberry Pi 4 optimized build:
curl https://raw.githubusercontent.com/virtualhere/script/main/install_server | sudo sh -s - vhusbdarmpi4
Going to explore some different software options using the USB over IP, just to try something different than KStars/Ekos/INDI.
I am going to have to figure out away to manage the ethernet cable… but that is a problem for another time. I am willing to deal with the cable if things work like I want them to.
It is suppose to be clear the next few nights so I am looking forward to testing out some different workflows and connectivity options. Stay tuned…