Exploring the Suffolk Virginia Night Sky – Astronomy, Astrophotography, Telescopes, EAA – Planets and Stars and Nebula and Galaxies – Looking, Learning, Sharing… Let's see what we can see…
The Suffolk Sky
---------------
Exploring the Suffolk Virginia Night Sky
Astronomy, Astrophotography, EAA
Planets and Stars and Nebula and Galaxies
Looking, Learning, Sharing...
Let's see what we can see...
Learning KStars/Ekos – Creating Darks with KStars/Ekos and SharpCap
Dark frames, dark calibration frames, or simply darks are used to compensate for hot pixels, thermal noise, amp glow, and other camera sensor noise artifacts in images, especially in longer exposure images. Most EAA software can apply darks during a live stack to help remove these artifacts from images. In this post I’ll walk through a method I use for creating a series of dark frames using the sequencer in the KStars/Ekos Capture Module and then how I use these dark frames to create a master dark using SharpCap Pro. Once the master darks are created they can be applied to EAA live stacks.
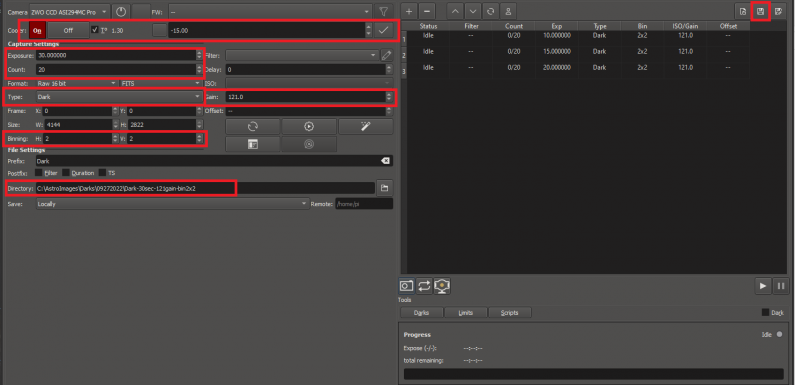
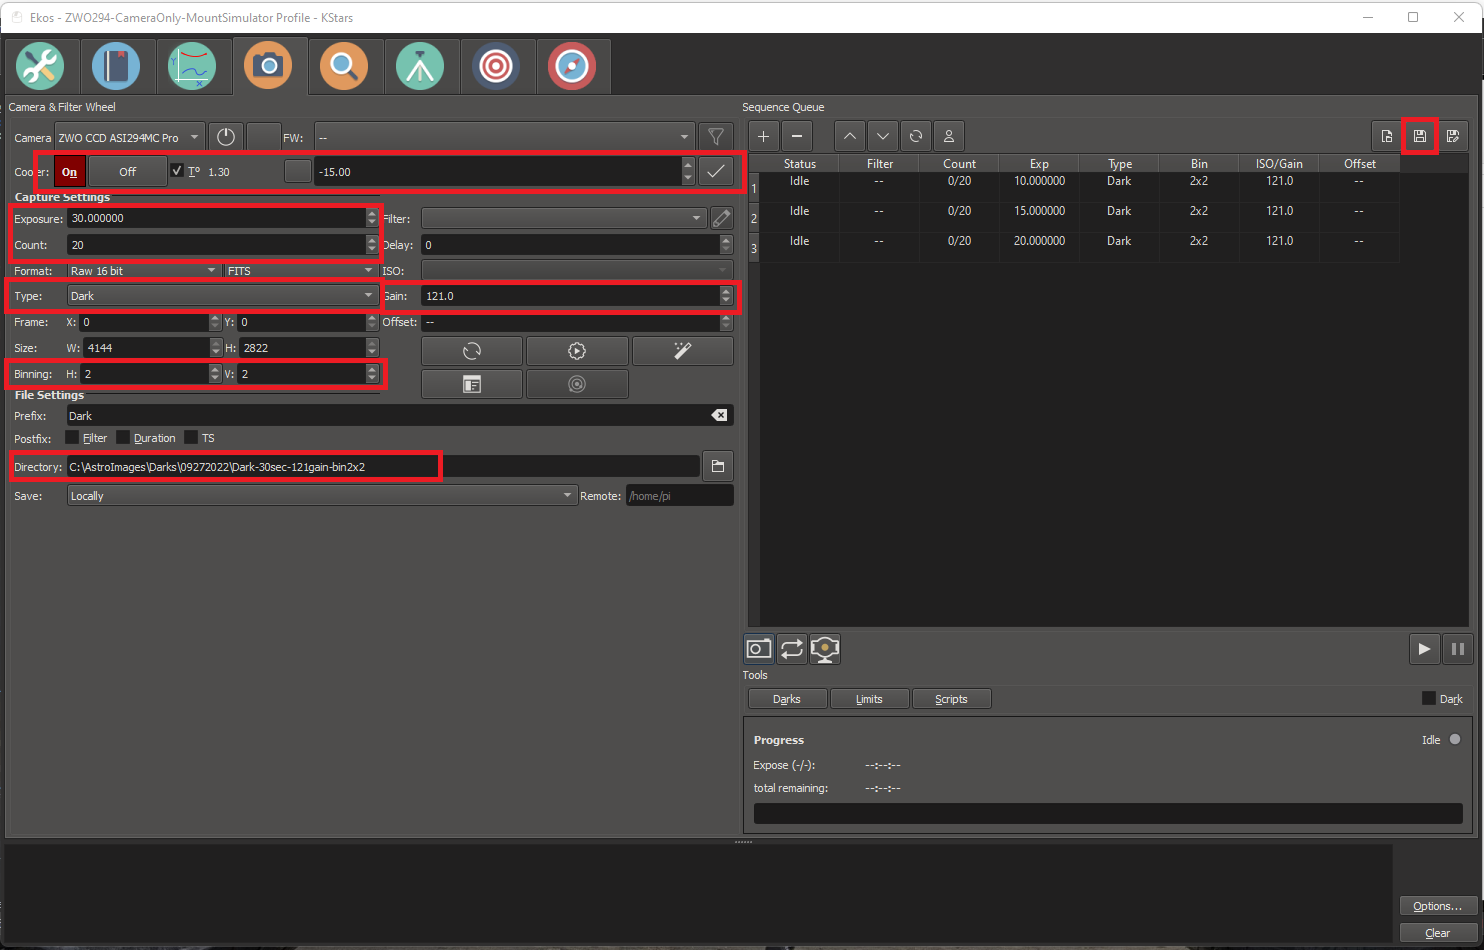
Darks should be created for each exposure length, bin, and gain settings used to capture light frames (actual images of the object). Darks should also be captured at the same temperature as the light frames. With a cooled camera, like the ZWO ASI294MC Pro, this is pretty easy since the sensor temperature can be set and maintained. I typically set the camera temperature -15 C. The most common exposure lengths I use for my EAA sessions are 10 seconds, 15, seconds, 20 seconds, and 30 seconds. I usually use the unity gain on my camera of 121 and bin 2×2.
To create darks the camera does not need to be attached to the telescope. Darks are not dependent on the image train, only the camera sensor. I can just cover the camera lens. If the camera is attached to the telescope I can put the lens cap on the telescope. When shooting darks it is important that lens is completely covered and that no extra light leaks in. If I am shooting my darks with the camera attached to the telescope I will often put the cover on the scope just to make sure no extra light is leaking in from anywhere in my image train.
I capture my darks remotely using Astroberry INDI Server running on a Raspberry Pi. After I connect up my camera and start the indi server on the Astroberry Raspberry Pi, I start KStars and the Ekos profile on my desktop PC. I validate the camera connection in the INDI Control panel and then go to the Ekos Capture Module. Here I set the camera temperature to -15 C and I check the enforce temperature box. The enforce temperature will ensure the camera is at the set temperature before starting a capture sequence. While I am waiting for the camera sensor to cool down I create my runs for the capture sequence.
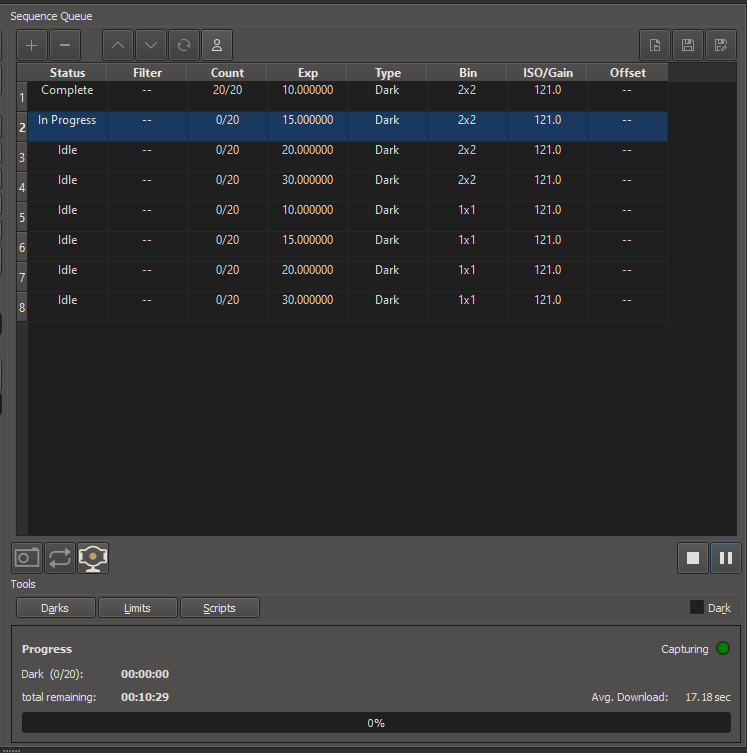
Using the Ekos Capture Module sequencer I set up the different dark capture runs for each of the exposure lengths, bin settings, and gains and add them to the sequence. I am creating sequences to capture darks for 10, 15, 20, and 30 second exposures all at 121 gain and bin 2×2 which are my most common EAA capture settings. I am also going to create a set capture sequences for each exposure length at gain 121 and bin 1×1.
For each sequence I am capturing 20 dark frames and I save each set of dark captures to a different folder (folder names: Dark-XXsec-YYYgain-binZxZ). Once I have the sequence configured I save it so I don’t have to recreate it every time I want/need to shoot new darks.
When I finish the configurations of the different individual capture sequences I click the Play button to run the sequence. It will take some time to complete all the sequence runs for the different exposure lengths, but it is a set it and forget it process – hit play and let the sequence run.
Once all the sequences have completed and all of the individual dark frames for each exposure/gain/bin setting have been saved to the corresponding directories, I move on to SharpCap to create the master darks. These masters will be saved to the Dark Library so they can be applied to my EAA session live stacks.
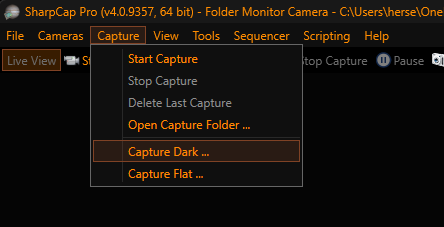
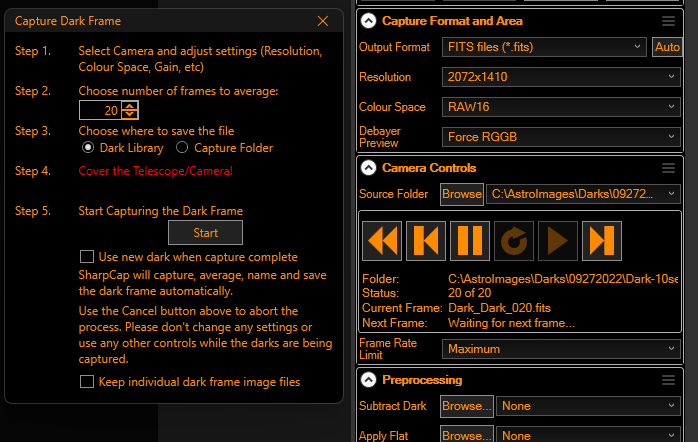
In SharpCap I use the folder monitor camera and in the Camera Controls panel I set the Source Folder by browsing to the directory which contains the individual dark FITS files captured in Ekos for the exposure length, gain, and bin setting. I set the Output Format to FITS Files since I want my master dark to be saved in the FITS format. Then from the SharpCap “Capture” menu I select “Capture Darks…” (this is only available in the licensed version of SharpCap Pro – spend the money, it’s worth it).
Selecting Capture Dark… opens the Capture Dark Frames window.
In the Capture Dark Frames window I set the number of frames to average to 20 (since that is the number of dark frames I captured in each Ekos sequence) and select the radio button to save the master dark to the Dark Library.
I click “Start” in the Dark Frames window and then press “Play” in the Camera Controls panel to read in the dark FITS images from the Source Folder. The Dark Capture routine averages the dark frames to create the master dark.
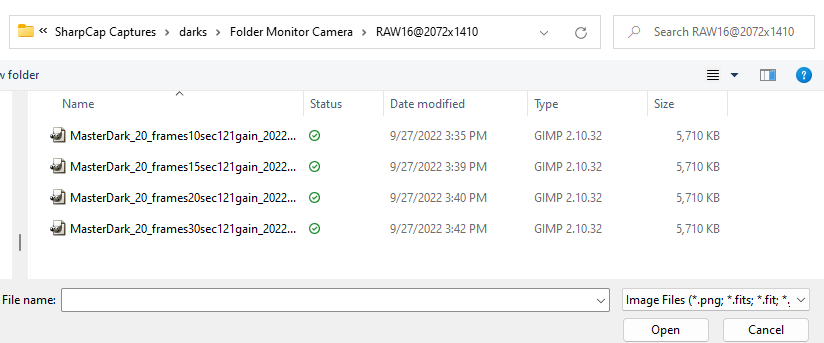
Once it has completed creating the master dark I browse to the Dark Library folder and manually rename the newly created master dark to add the exposure length and gain to the filename, this makes it easier to find the correct master to apply to a live stack.
I repeat the Capture Dark process for each of the exposure/gain/bin darks I captured with Ekos.
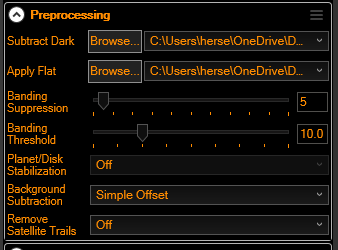
To apply a master dark to frames received during a EAA live stack with SharpCap, in the Preprocessing panel browse to the correct master dark in the Dark Library and select it for the “Subtract Dark”.
The selected master dark will be used when processing each frame for the live stack in SharpCap.
This may not be the simplest process for creating darks, but it allows me to capture and create master darks for multiple different exposure/gain/bin settings in one set up using the sequencer in the Ekos Capture module and the “Capture Darks…” workflow in SharpCap.
Regardless of how you capture darks here are a few tips:
Darks reduce noise and can significantly improve image quality for EAA and Astrophotography.
The camera does not need to be attached to a telescope to create darks.
Make sure there is no light leaking in around the lens cover when capturing darks.
Capture darks at the same temperature you will be capturing your light frames. A cooled camera makes this easier, but is not necessary.
Capture darks for each exposure, gain, and bin setting.
Use a sequencer to capture darks for different settings in a single setup.
It is not necessary to capture darks for every session… darks can be used over multiple sessions as long as the temperature is the same. I typically reshoot darks every couple weeks – needed or not.
If you are reusing darks and you notice hot pixels or other noise it is likely time to reshoot your darks.
Don’t forget to apply the master dark to the live stack!
Hope you found this helpful. If you have questions about darks or the method I have covered here please leave them in the comments. Have a tip or trick for creating darks, would love to hear about it as well – just drop it in the comments.