Even though I have my gear set up to remotely operate the mount and cameras using Ekos/INDI there are several times during a EAA observing session where I am required to take a trip out to the scope. Whenever I need to adjust focus is one of those times… well not anymore. I am adding a ZWO Electronic Automatic Focuser (EAF) to my setup.
I purchased the ZWO EAF Advanced Set which includes the EAF with associated hardware, USB cable, bracket, and couplers, the hand controller, and the temperature probe from Agena Astro.
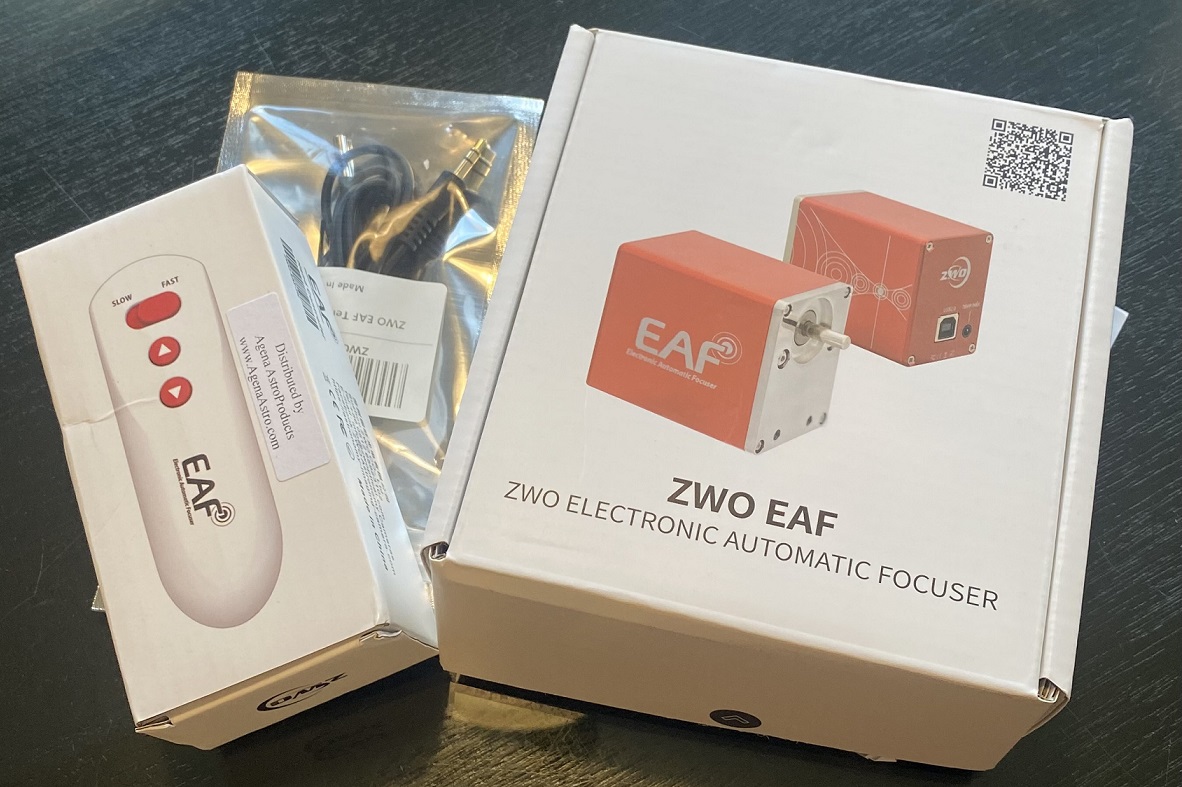
The ZWO EAF was in stock, shipped quick, and arrived safely.
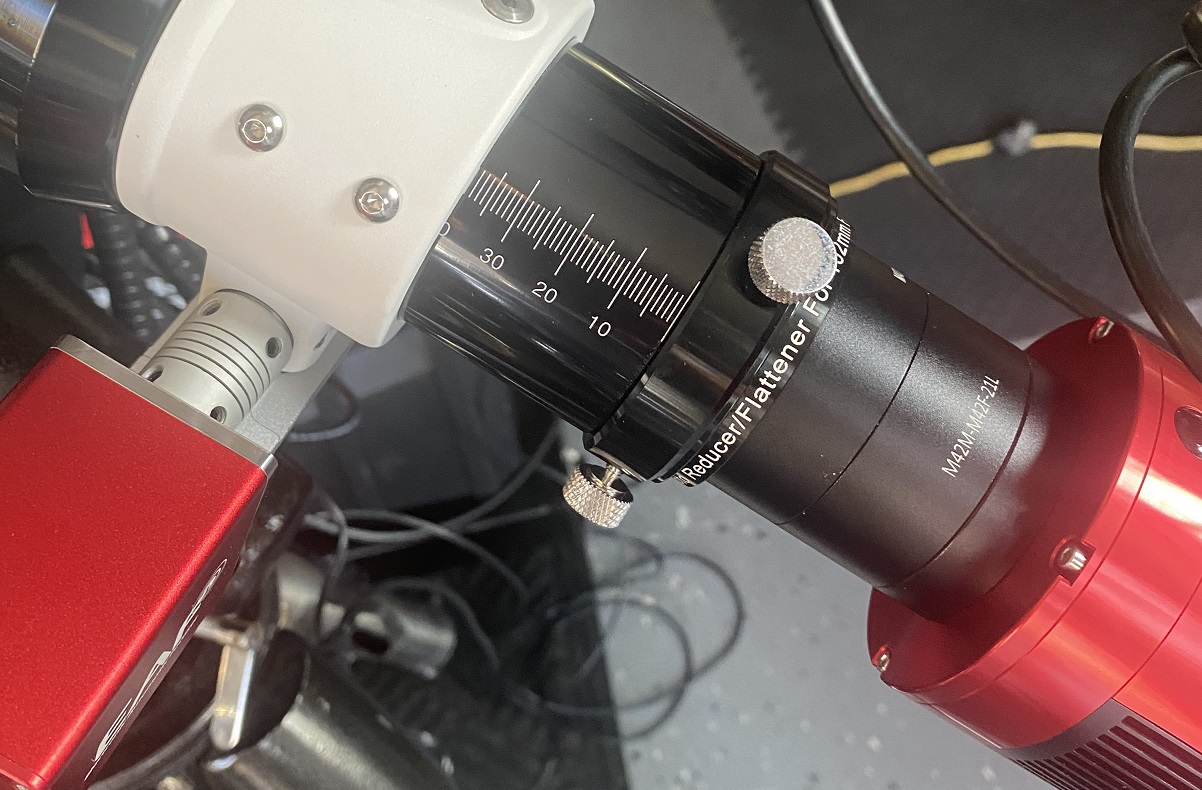
ZWO does not list the SVBONY SV503 102ED telescope as a compatible telescope on their supported hardware list but there is an easy to follow guide for installing the ZWO EAF on the SV503 on SVBONY’s site. I followed these instructions to get the ZWO EAF mounted to the my SV503 scope. The installation is a pretty straight-forward and simple process which only took about 10 minutes.
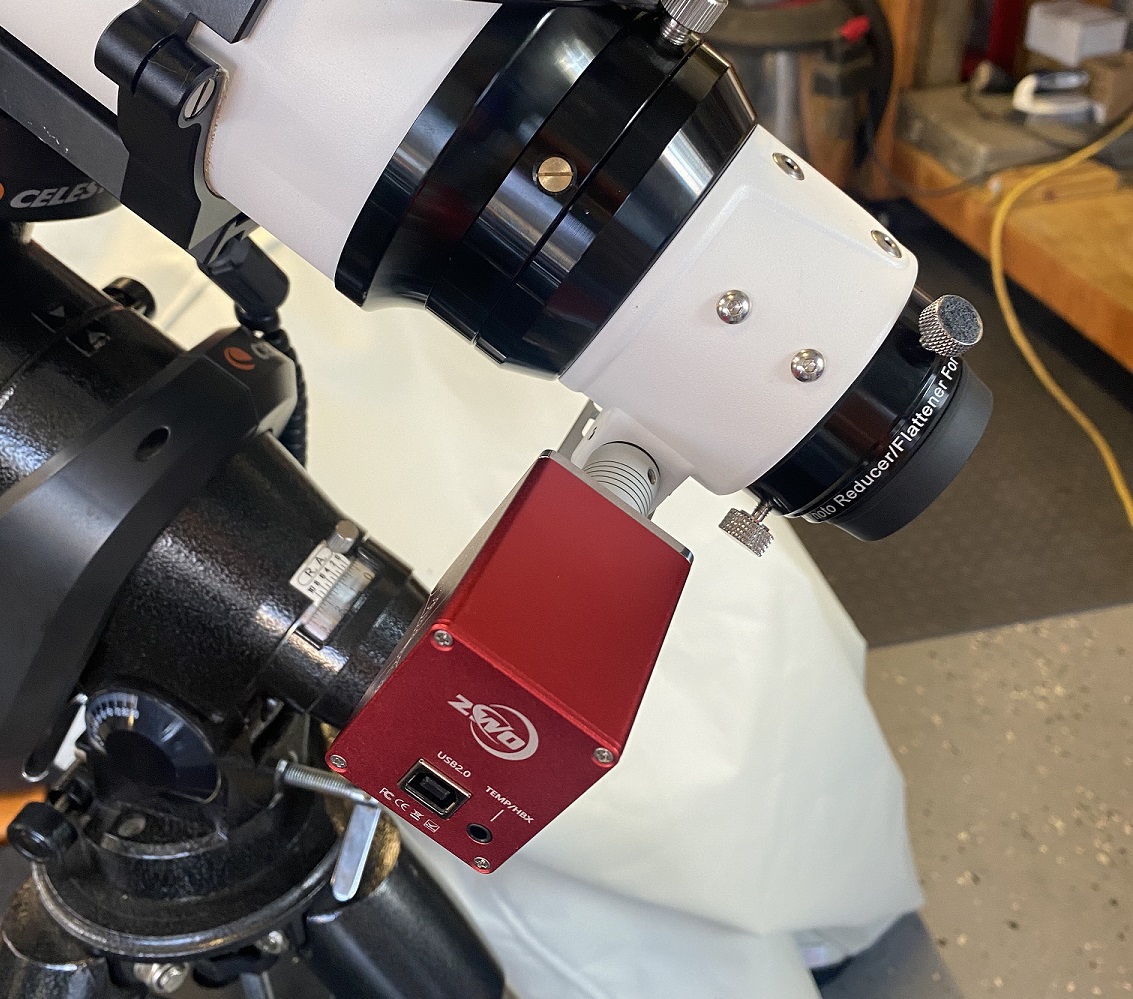
With the EAF now mounted to the telescope I connected the EAF USB cable to a USB port on the ZWO ASI294MC Pro. The EAF I purchased is the newer 5V model which is powered by USB so no additional power cable is needed.
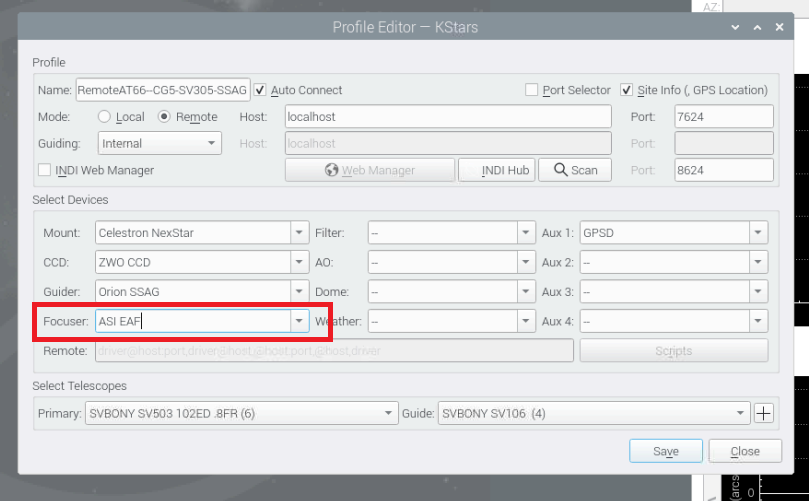
Now to set up the EAF driver in INDI and configure Ekos to use it. From the Astroberry Web Interface I added the ASI EAF driver to the INDI server configuration and started the INDI server. Then I set the focuser to the ASI EAF in my Ekos profile in KStars.
I started the Ekos profile and verified the ASI EAF is connected in the INDI control panel.
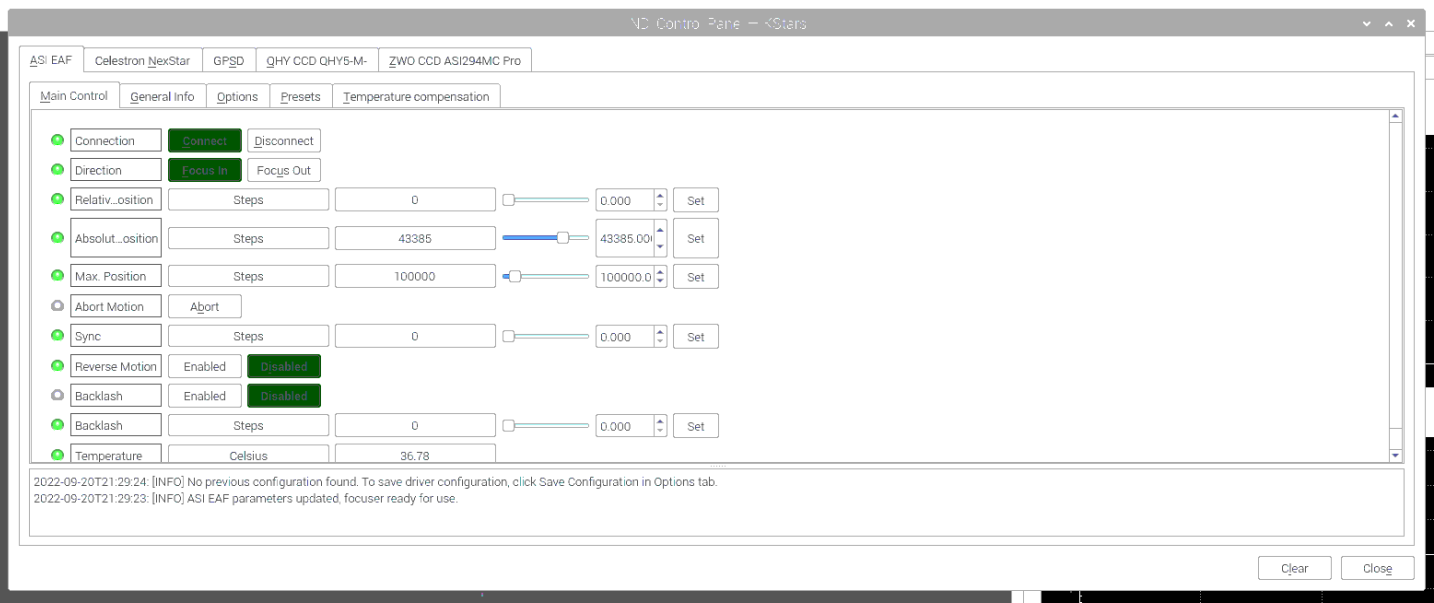
Success!!! The INDI Control Panel screenshot above shows the default EAF configuration settings.
Before I can use the EAF to focus I need to configure the maximum inward focus (zero), the maximum outward focus, and determine the backlash for calibration. I connected the hand controller to the port on the EAF to help with the initial setup (it was easier IMHO to use the buttons on the hand controller to move the focuser than it was to keep setting the relative position). I’ll replace the hand controller with the temperature probe once I have completed the initial set up.
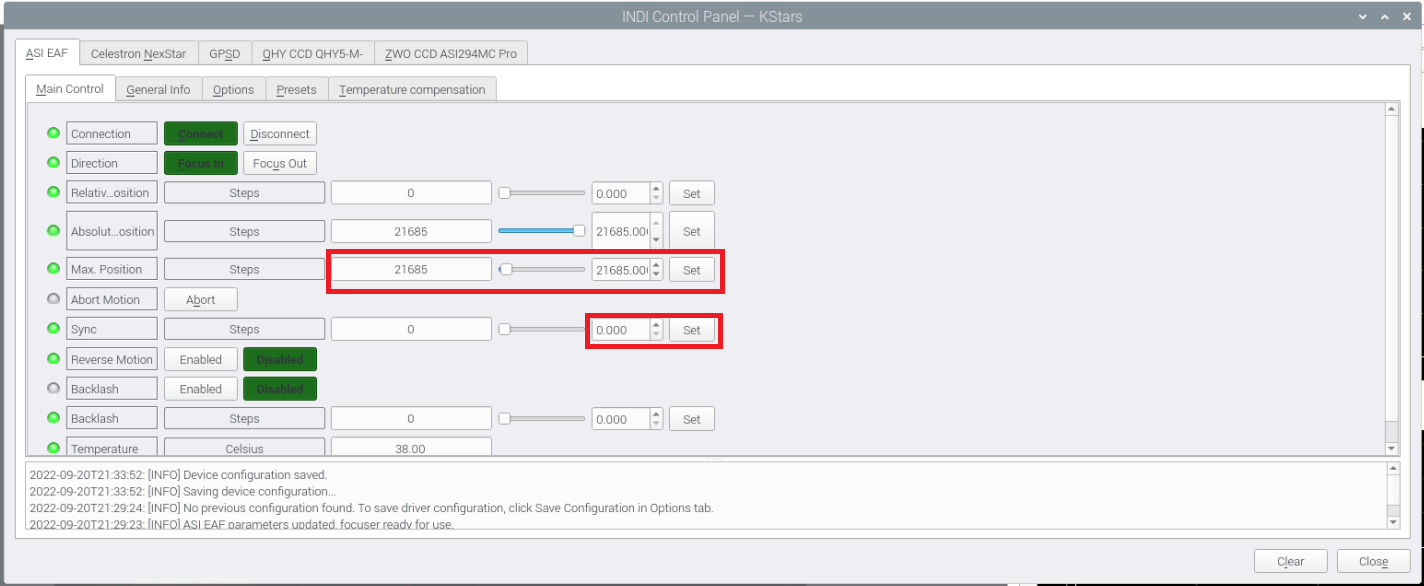
When I installed the EAF on the SV503 I made sure the focuser was all the way in, this is the EAF’s zero or the most inward point the focuser will move. I sync the EAF to this “zero” in the INDI control panel. Once synced the Absolute Position value should be 0, this means the EAF is at 0 and will not move in any further.
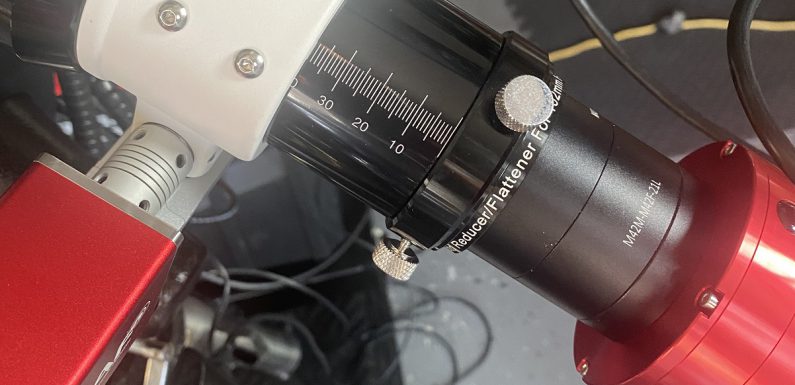
I used the hand controller to move the focus tube out to the maximum position (there is 90mm of focus travel on the SV503 102ED, I took it to the 80 mm tick on the focus tube – so not all the way out, but further out than I have ever needed it). As I moved the focuser out with the hand controller the steps the motor moves out are displayed as the Absolute Position value. Once the focuser is as far out as I want it, I copy the Absolute Position value (21685). I set this as the Max Position value (21685) in the INDI control panel.
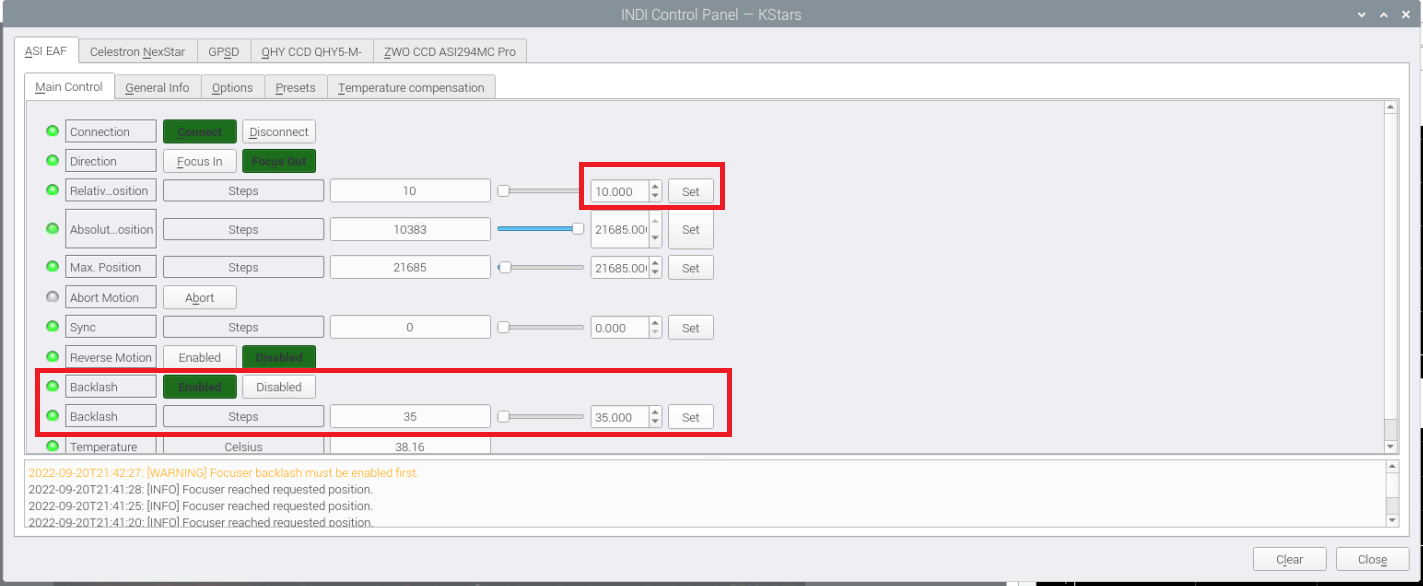
Next I determined the backlash. Backlash is the number of steps the EAF has to move for the gears to engage when changing focus direction. I set the Absolute Position value to somewhere in the middle of the zero and Max Position, since I am moving in from the Max Position I will be moving out, at least initially, to determine the backlash.
I used the Relative Position to move the focuser out 10 steps at a time, counting the number of times I had to move it until I could see the focuser move. It took 40 (4 x 10) steps before the focuser visually moved. I then moved back 100 steps and then did 30 steps in, and then 9 steps in – I went through this process a few times, decreasing the number of steps in each time until I did not see the focuser move. After a few iterations of this process I was able to determine that the backlash is somewhere between 34 and 37 steps, It is nearly impossible to see a single step of movement so I swaged it to 35. I enable the Backlash setting and set the backlash steps to 35.
Before installing the EAF I noted my current focus location using the tick marks on the focus tube (~39mm out). If I get it back to approximately this position I should be pretty close to focus. I used the hand controller to move the focuser until I was around the 39mm tick mark.
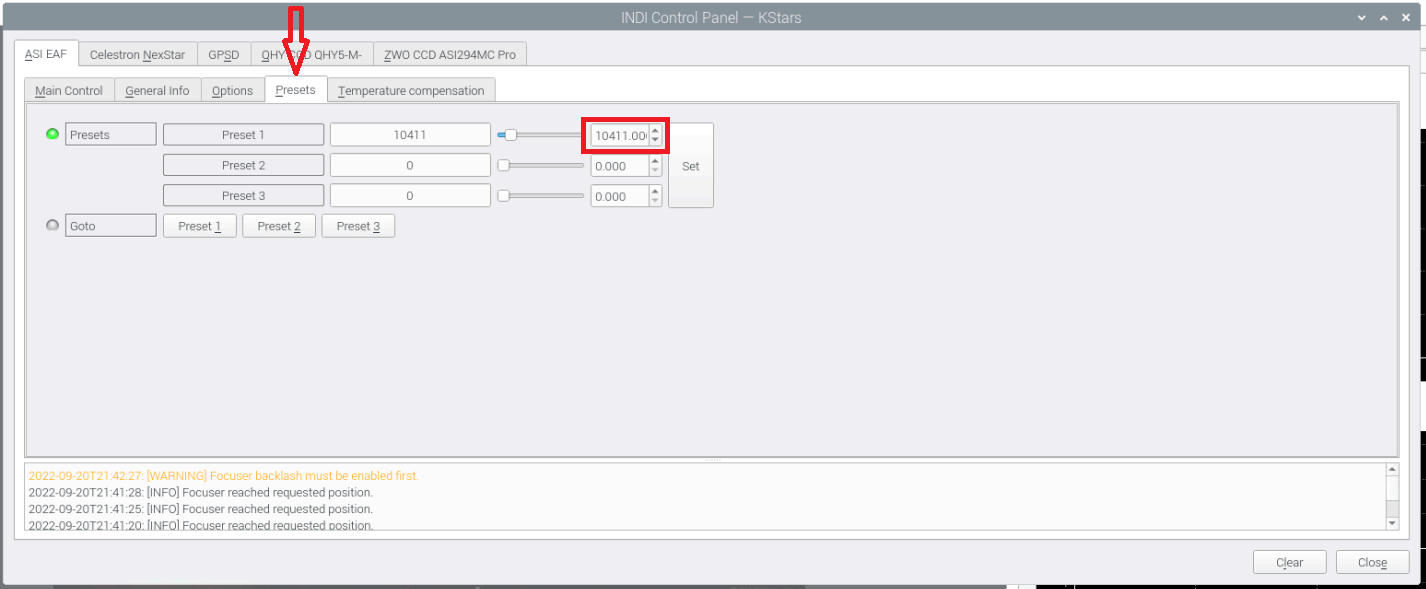
I noted the value of the Absolute Position (10411). This should be roughly where I have focus, at least good enough to see some stars, with the 0.8 Focal Reducer and UV/IR Cut filter. Since this is the set up I use the most I can set this value (10411) to Preset 1 on the Presets tab.
After I synced zero, set the Max Position, configured the Backlash, and set the focus position preset I saved the configuration from the Options tab in the INDI control panel.
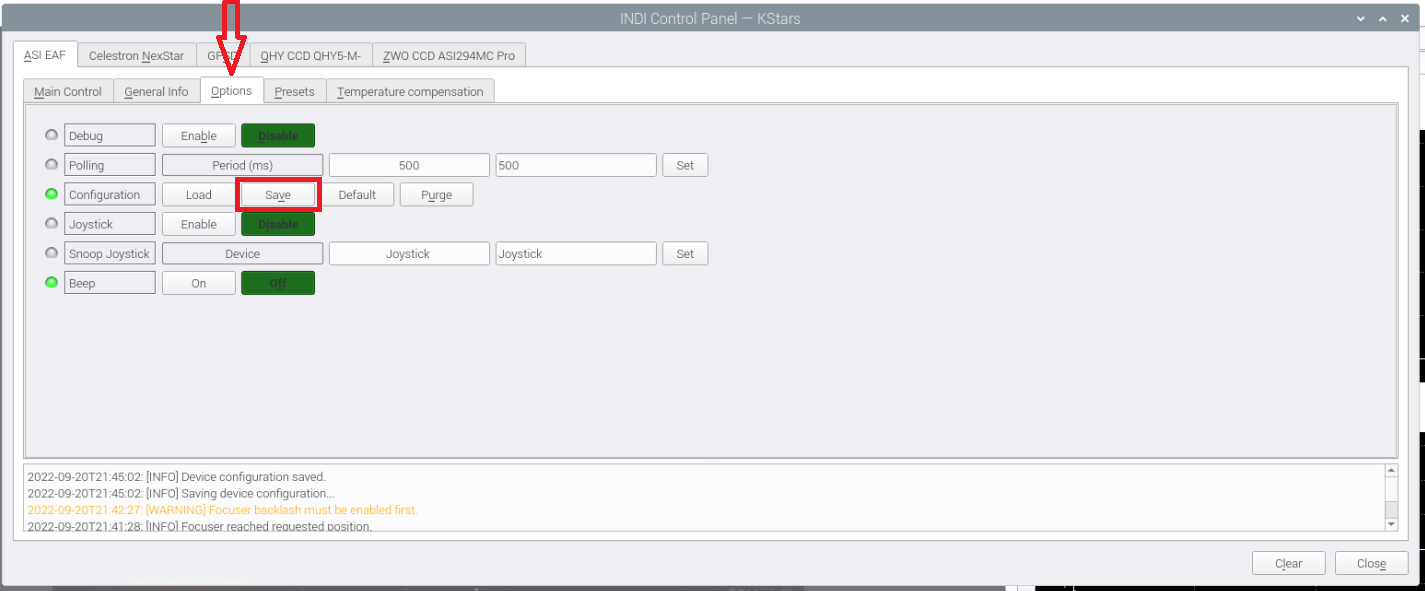
This saves the configurations to the device so as long as I don’t change anything with the EAF or the focus tube I won’t have to run this initial set up again.
After saving the configuration I did some basic testing. I set the Absolute Position to 0 and the EAF focused all the way in. From the Presets Tab I selected the Goto Preset 1 and the EAF moved the focuser to the preconfigured position (Absolute Position 10411 which is at the 39mm tick on the focus tube). I did some backlash testing by moving the focuser in one direction a few hundred steps and then in the other direction the same amount of steps to make sure it was visually returning to the original position (I used one of the grub screws on the focus knob as a reference point for this). I think I got it pretty well dialed in. I removed the hand controller and replaced it with the temperature probe to verify it is working… all is well.
Few quick notes and tips…
- Initially leave all the bracket screws loose, and tighten them evenly to ensure everything is aligned.
- Do not over tighten the screws on the focuser or the EAF. Make sure they are secure but don’t muscle down on them.
- Once the EAF is attached the manual focus knobs cannot be used. Only change focus using the EAF with the hand controller or through software.
- If you detach the coupler or change the position of the focus tube the initial setup of Zero, Max Position, Backlash, and Focus Presets will need to be redone.
- Make sure to save the device configuration!
Now that the EAF is set up I will be able to use the Ekos Focus Module to hopefully get precise automatic focus… but I’ll have to wait for a clear night to test it.


