Exploring the Suffolk Virginia Night Sky – Astronomy, Astrophotography, Telescopes, EAA – Planets and Stars and Nebula and Galaxies – Looking, Learning, Sharing… Let's see what we can see…
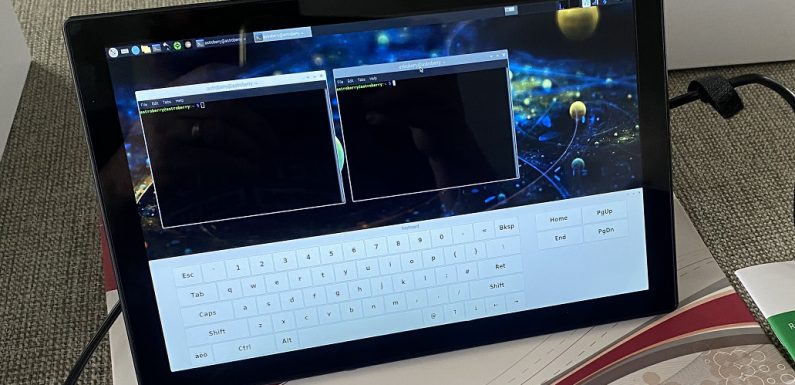
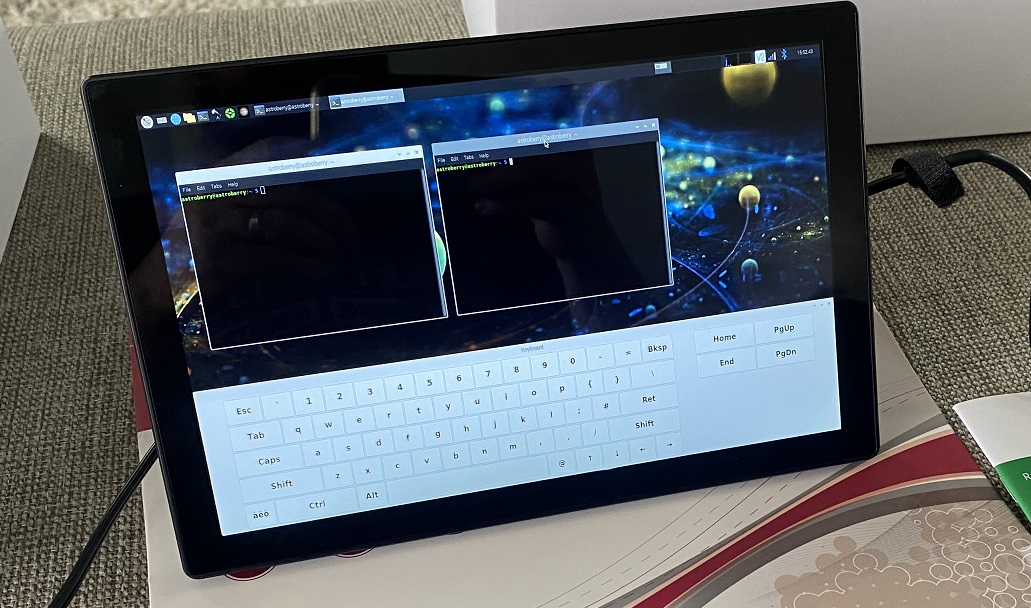
While I am waiting for the sky to clear I added a display to the Raspberry Pi running Astroberry which I have been using to control my camera and mount for my EAA sessions. I picked up a 10.1″ touch screen monitor with an integrated Raspberry Pi case. The display should allow me to do the things I need to do at the scope, like setting up the mount, checking focus, polar alignment, taking darks and flat, and making sure plate solving works, without needing my laptop.
I looked at both 10.1″ displays and 7″ displays, I decided on this 10.1″ 1920×1200 touch screen monitor which also houses, and provides power to, the Raspberry Pi.
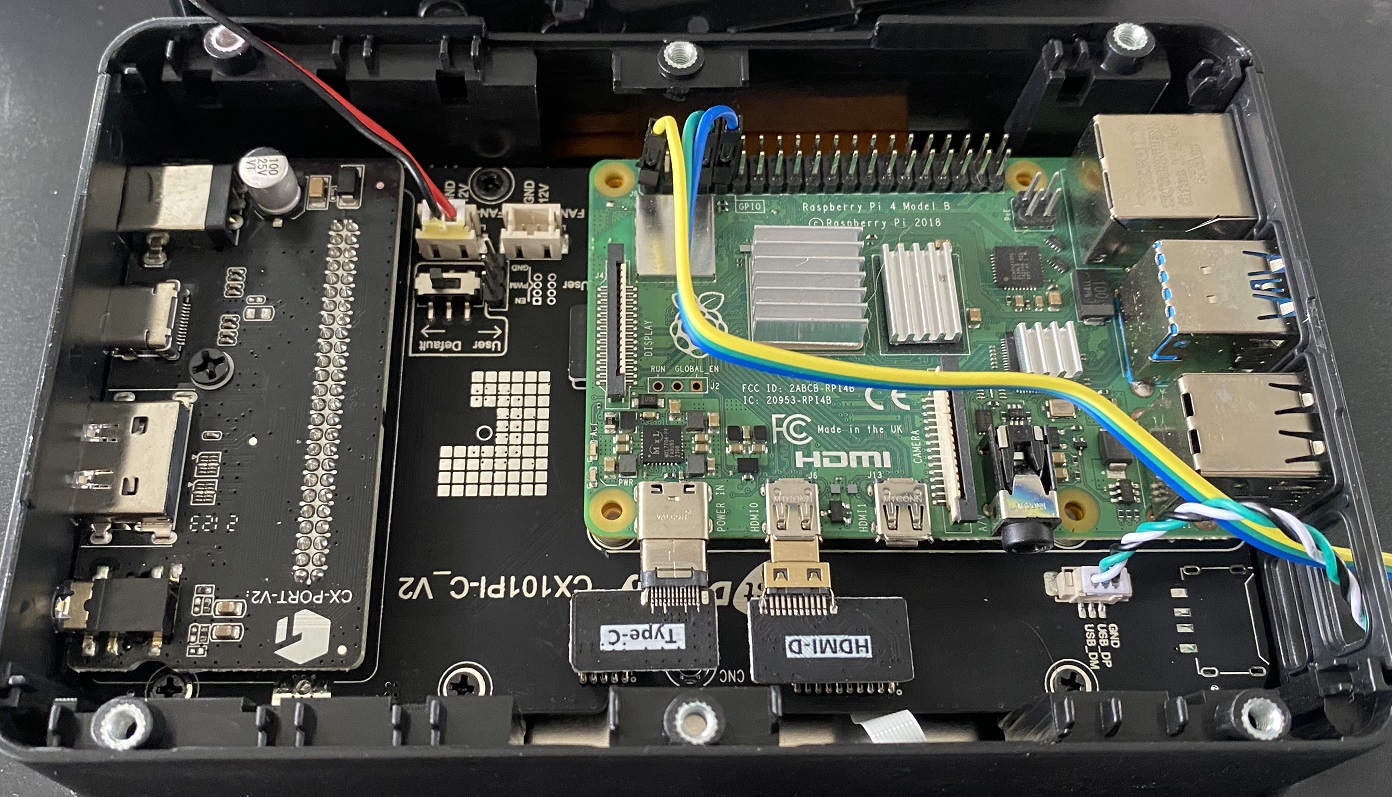
The kit comes with all the connectors, screws, and panels you need to install a Raspberry Pi 4 or Raspberry Pi 3 into the integrated case. There is a power connector, a HDMI connector, and the USB connection for the touch screen.
The instruction which came with the kit were ok and everything fit together as it should. The connection for the touch screen does take up a USB port, but there is an option to solder this to the Raspberry Pi board. I am just using the USB connection for now, if I find I need the port in the future I’ll make the soldered connection.
The display runs off 12 volt DC and provides power to the Raspberry Pi. It also has a fan to keep the display controller and the Raspberry Pi cool.
There is room between the Pi and the top of the enclosure for connections to the GPIO pins. The connections I have on the GPIO are for a temperature and humidity sensor… more on that later in the post.
Adding an on-screen keyboard
The touch screen works well. It is accurate and responsive but I’ll need a way to type. I could use a bluetooth keyboard and mouse, but that would just be more stuff to keep up with. I installed an on-screen keyboard using the following command:
sudo apt install matchbox-keyboard
The on-screen keyboard lets me type by touch into terminal windows or KStars/Ekos.
The on-screen keyboard does take up a fair bit of the screen real estate but it works just fine.
Setting display to power off
Screen blanking is enabled by default in Astroberry. This blanks the screen but does not put the display in standby. With the screen blanked the backlight is still on. To save power add the following to /boot/config.txt:
hdmi_blanking=1
This enables the display power management and turns off power to the HDMI port after 600 seconds (5 minutes) which causes the display and the backlight to power off. Touching the screen wakes the display back up.
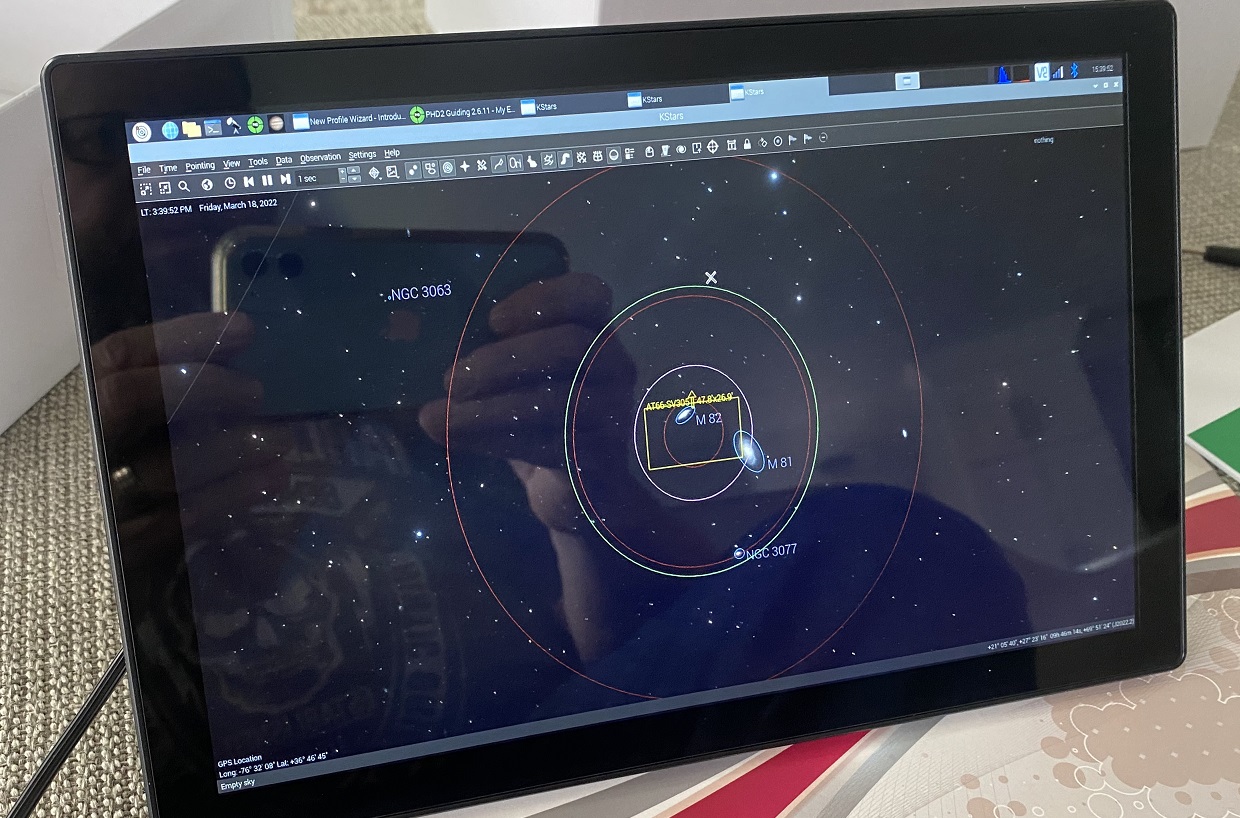
I launched KStars and tested accessing and using Ekos/INDI. All works well.
Temperature Sensor
I had a DHT11 temperature sensor in my box of Raspberry Pi parts so I decided to wire that in to the GPIO to get a outside temperature reading. The DHT11 temperature sensor is not particularly accurate, but it works well enough. This DHT11 Sensor already has the step down resistor so it makes it easy to connect up. I connected the DHT11 to the Pin 1 (+3 volt), Pin 7 (GPIO4), and Pin 9 (Ground). I wrote a python script to get the temperature and humidity from the sensor and display it.
#!/usr/bin/env python3

#

# Get and Display Temperature and Humidity from DHT11 Sensor connected to GPIO4

# https://learn.adafruit.com/dht/dht-circuitpython-code

#

import board

import adafruit_dht

# Initial the dht device, with data pin connected to:

dhtDevice = adafruit_dht.DHT11(board.D4)

#Convert C to F

tempF = dhtDevice.temperature * 1.8 + 32

# Print Temperature (F) and Humidity

# Temperature in F

print ("Temperature:", tempF, "F")

# Temperature in C

print ("Temperature:", dhtDevice.temperature, "C")

# Humidity

print ("Humidity:", dhtDevice.humidity,"%")
Nothing fancy but it works. I totally did not need this, but I had the sensor and figured I would just play with it. I am going to mount the sensor to the back of the display case. I may try to integrate this into the Astroberry web interface.
The display and integrated Raspberry Pi case fits nicely in the box with the rest of my EAA gear. I am going to figure out a way to attach it to the inside of the lid of my EAA gear box, probably velcro strips.
This should allow me to do all the stuff I need to do at the scope before my EAA session. Getting focus, taking darks, taking flats, polar aligning, testing plate solving, etc can all be done without needing my laptop. I could also use it for the EAA session if I were not at home or if I just wanted to stay outside with the scope.
Now I just need a clear night to test it out for EAA.
I leave the screen and Raspberry Pi out with the scope in my EAA Box. The only reason I have the display on there is for the initial setup, such as focusing, alignment, etc – things I have to do out at the scope. Just makes things a bit easier as I do not have to have my laptop out there. After I get things set up initially I connect to the gear with KStars/Ekos through the indiserver running on the Astroberry Raspberry Pi. I can connect to the Pi via VNC if needed, but it is usually not necessary.
That’s so nice. Good to have a large display like that. Also, thanks for sharing your workflow. I too have a StellarMate OS installed on R-pi4 with 4″ touch screen display, all of them in a small case attached to the OTA. It makes the things much cleaner and easier, and crash proof too. R-pi4 stays all the time outside on OTA during the entire session. I also use it using StellarMate Android app or Kstars on my laptop for some quick checks/setup, but then run everything on R-pi4 and just go to sleep for 2-3 hours, hoping for the best ending 🙂
I’m working on a similar project for my gear (super new to playing with RPi stuff still) but I backpack with mine so I am trying to be weight conscious as well which means I would need this same set up to able to run off a jump pack/5volt option so I don’t have to carry my larger battery pack that can handle the 12v requirement on the current monitor setup as if weighs a few lbs


Just wondering on your home workflow with the RPI screen.
If your at home do you leave the screen outside at the scope and vnc into the pi?
I leave the screen and Raspberry Pi out with the scope in my EAA Box. The only reason I have the display on there is for the initial setup, such as focusing, alignment, etc – things I have to do out at the scope. Just makes things a bit easier as I do not have to have my laptop out there. After I get things set up initially I connect to the gear with KStars/Ekos through the indiserver running on the Astroberry Raspberry Pi. I can connect to the Pi via VNC if needed, but it is usually not necessary.
Here is my workflow for connecting to and controlling things remotely with KStas/Ekos/INDI.
Hope this is helpful. Shout out if you have any questions.
Thanks
Hersey
That’s so nice. Good to have a large display like that. Also, thanks for sharing your workflow. I too have a StellarMate OS installed on R-pi4 with 4″ touch screen display, all of them in a small case attached to the OTA. It makes the things much cleaner and easier, and crash proof too. R-pi4 stays all the time outside on OTA during the entire session. I also use it using StellarMate Android app or Kstars on my laptop for some quick checks/setup, but then run everything on R-pi4 and just go to sleep for 2-3 hours, hoping for the best ending 🙂
I’m working on a similar project for my gear (super new to playing with RPi stuff still) but I backpack with mine so I am trying to be weight conscious as well which means I would need this same set up to able to run off a jump pack/5volt option so I don’t have to carry my larger battery pack that can handle the 12v requirement on the current monitor setup as if weighs a few lbs