Exploring the Suffolk Virginia Night Sky – Astronomy, Astrophotography, Telescopes, EAA – Planets and Stars and Nebula and Galaxies – Looking, Learning, Sharing… Let's see what we can see…
Electronically Assisted Astronomy, or EAA, is a method of observing where the telescope eyepiece is replaced with a camera. Images of an object are captured and then live stacked to be viewed in real time. This is a bit different from Astrophotography where the images that are captured are stacked afterwards and then processed, or edited, to create the final image. Typically the exposures for EAA are also much shorter, seconds up to a minute or so, than those acquired for Astrophotography, where hours of data is collected from exposures of 5 minutes or more. Just to learn a bit about post processing techniques I took the frames from a couple of my best captures from the 09/16/2022 EAA session and did some post processing work on them.
I was not looking at this as an exercise in astrophotography. This was taking some data I already captured for a different purpose (EAA) and using that data in order to learn a bit about some of the post-processing techniques which are commonly used to create astrophotography images. I went through this process mostly to learn and to also see what else I might see.
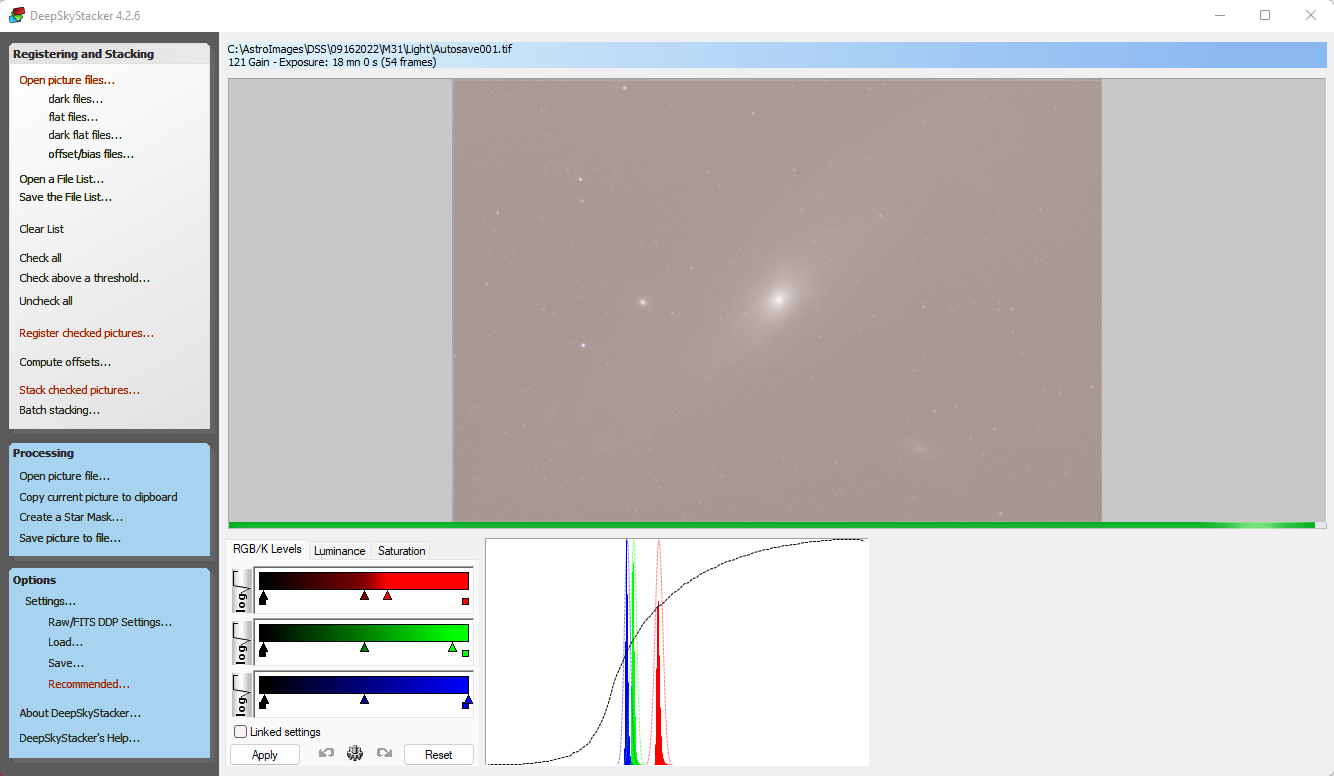
I started by restacking the frames I captured of M31 and NGC 7935 during one of my EAA observing session this past weekend. I used Deep Sky Stacker to post stack the individual FITS captures for each object. I have a lot to learn about DSS so I am basically just using the default settings for now. I did add and apply the flats and darks I had captured during the session.
I did not do any adjustments to the images in DSS, just saved the resulting stacked image as a TIFF (.tif). After stacking I loaded the TIFF image I had saved from DSS up in the GNU Image Manipulation Program, also known as GIMP, and did some editing of the color levels and curves based on this tutorial:
It is pretty basic but definitely an easy way to enhance the images. For someone starting from scratch in regards to image editing and hoping to learn the art of what is possible I think this tutorial is great place to start.
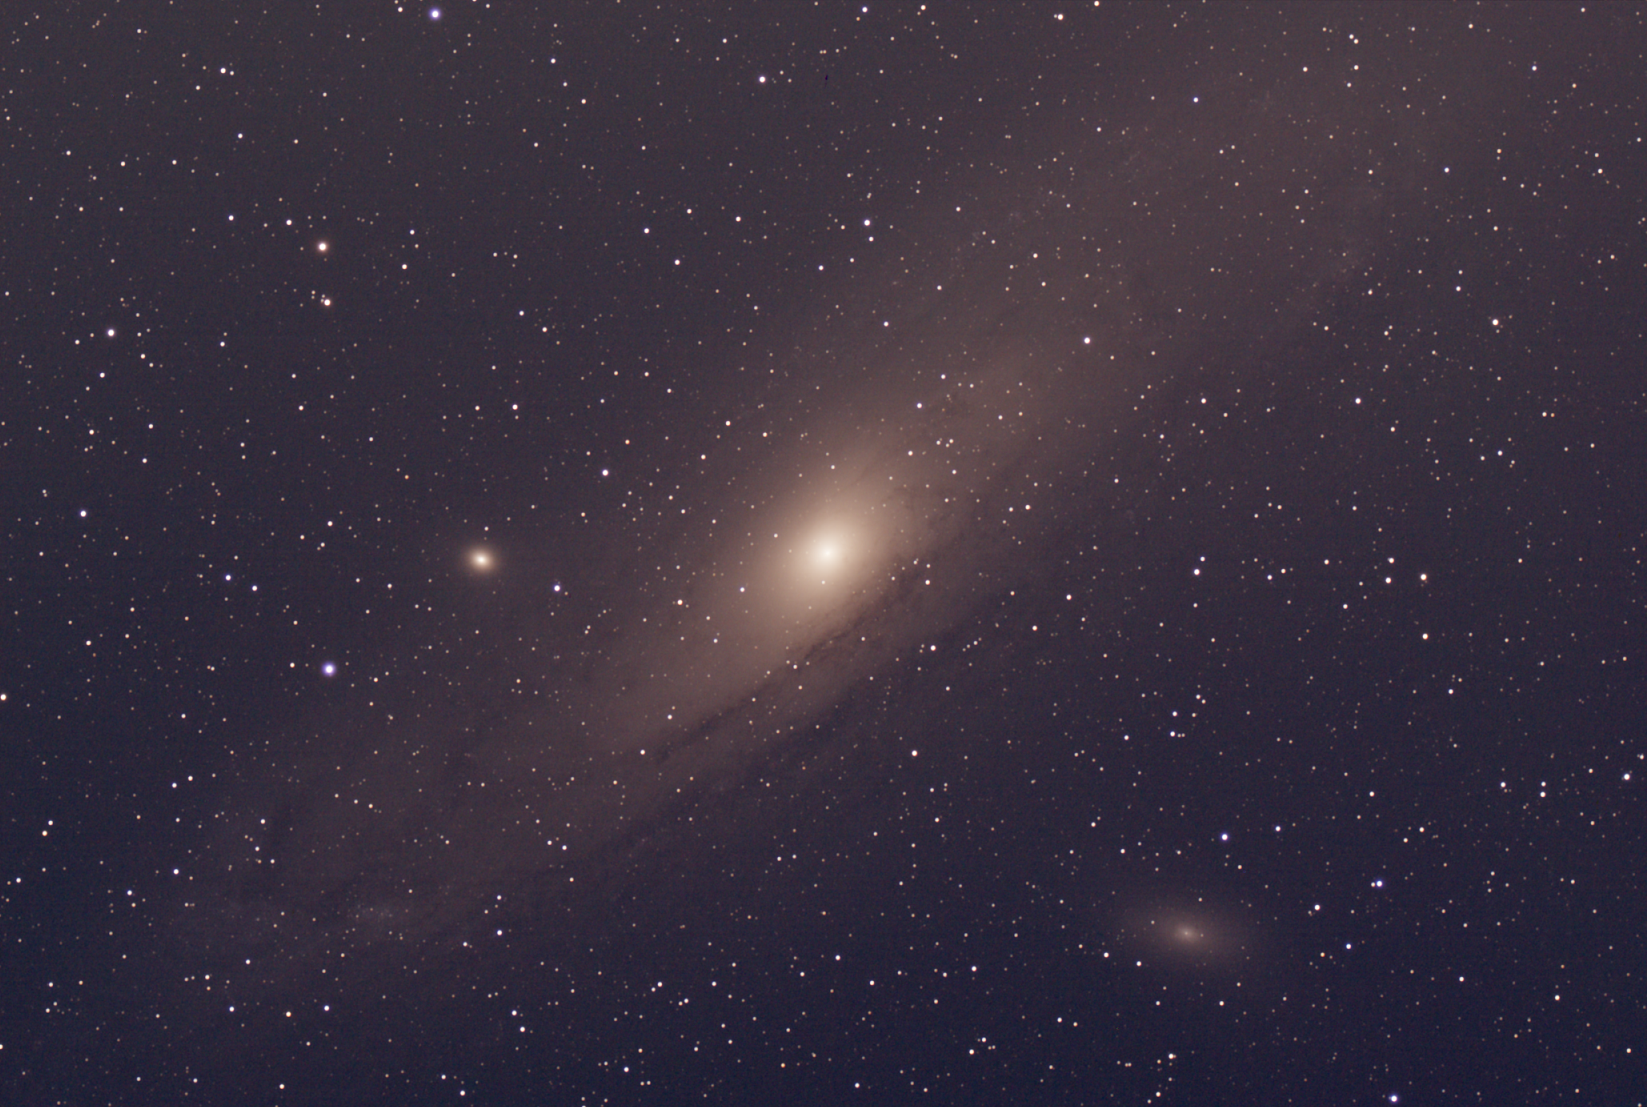
The first object I decided to do some post process editing on is the Andromeda Galaxy (M31). This is M31 as saved from the SharpCap Pro live stack during my EAA session on 09/16/2022.
One of my best EAA observations of M31 so far. Enjoyed seeing some of the details in the dust lanes and in the outer arms of our neighboring galaxy. M32 and M110 are also visible in the field of view. Really enjoyed watching the details of M31 come into view during the EAA live stack.
To do some post processing on this I stacked the M31 FITS files captured during the EAA session using DSS.
I did not do any histogram manipulation/stretching in DSS. After the stacking process completed I saved the resulting DSS stack as a TIFF, then opened the TIFF in GIMP, and edited the color levels and curves using GIMP. Once I was somewhat happy with the results I exported the processed image to PNG.
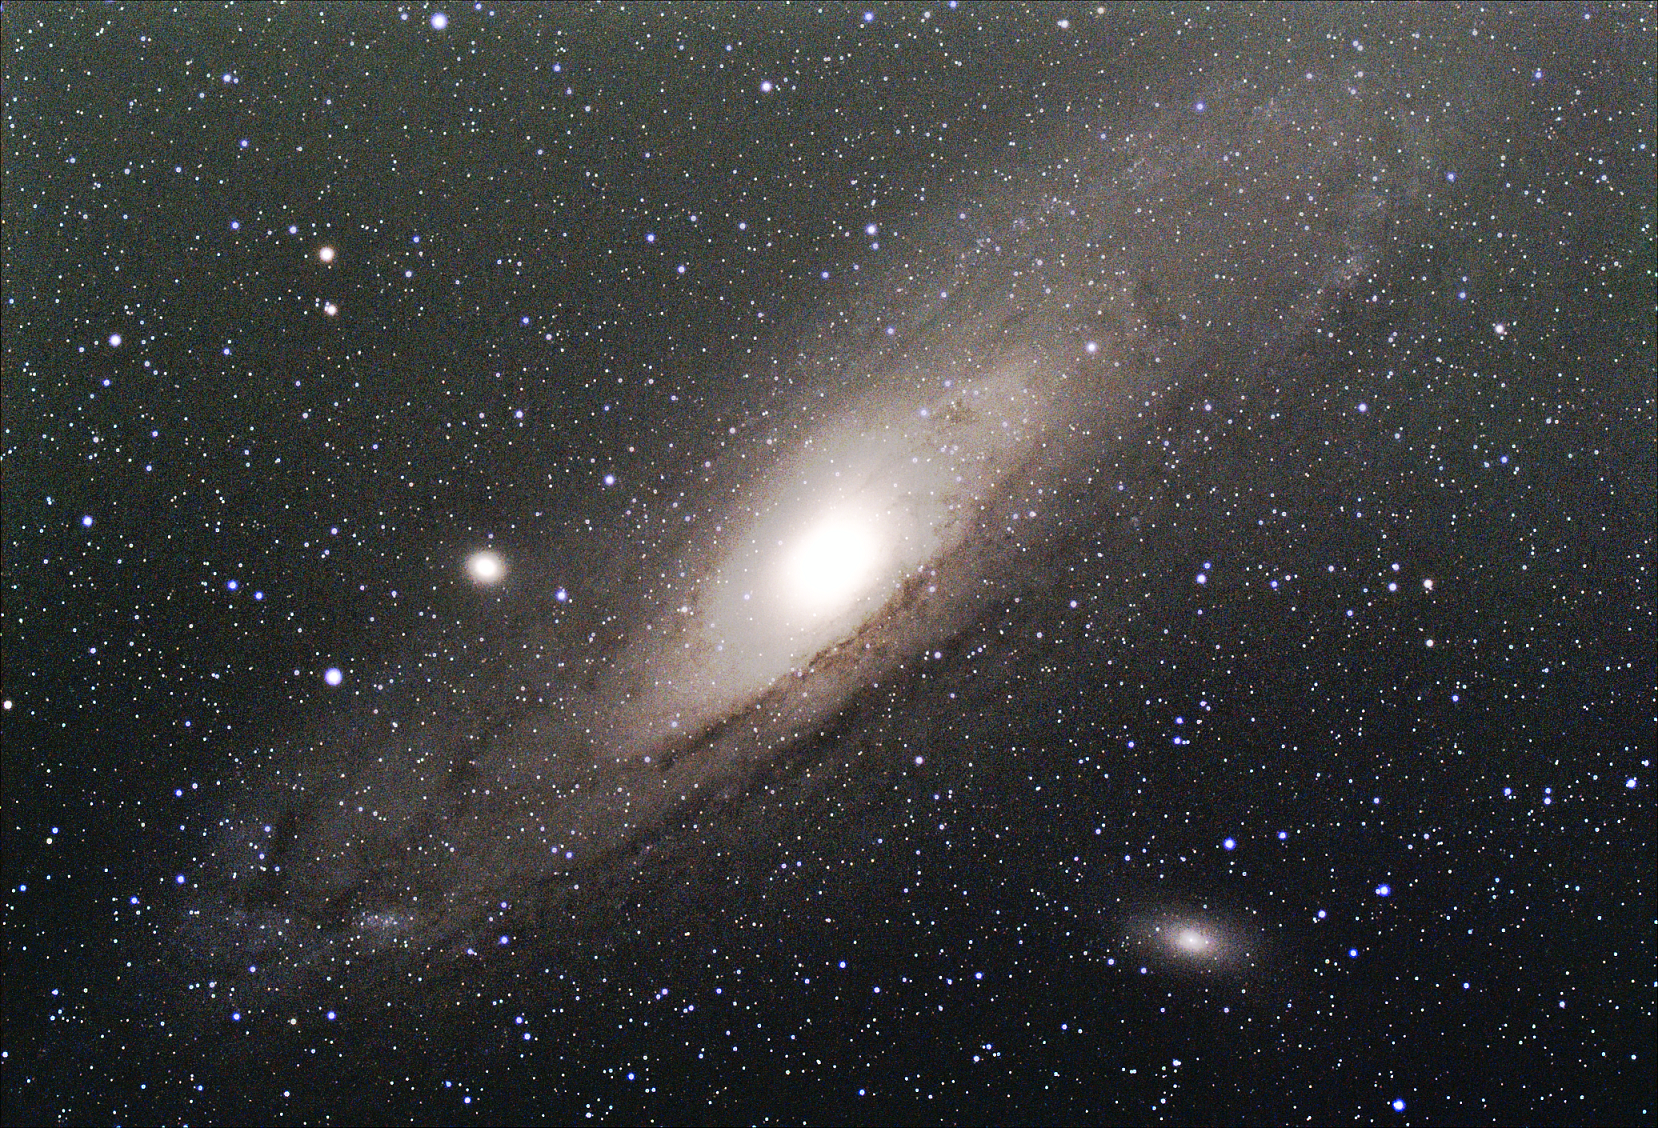
Here is M31 after stacking the original frames in Deep Sky Stacker (DSS) and then doing the basic processing techniques in GIMP from the YouTube tutorial above.
The center of the Andromeda galaxy is bright and blown out, but there is some more detail and color revealed especially in the outer arms. Details in the dust lanes are also more apparent. Only spent a few minutes messing with it in GIMP. With a little more time and practice I should be able to figure out how to fix the center brightness. I’ll keep practicing. It is also important to call out that this is less than 20 minutes of data captured in 20 second exposures – more data would mean more details but that is still pretty neat (IMHO) for what data I have.
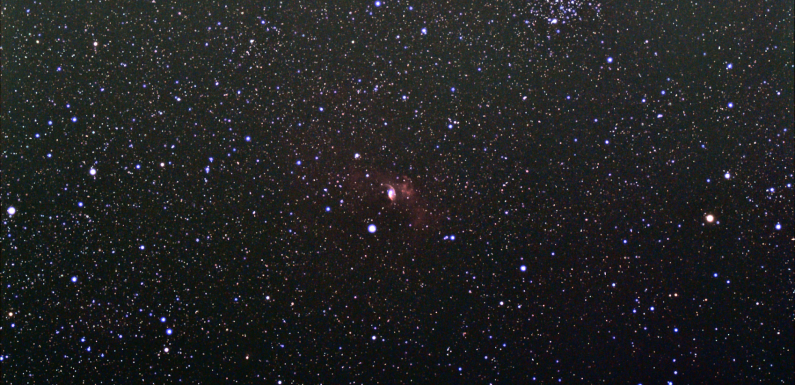
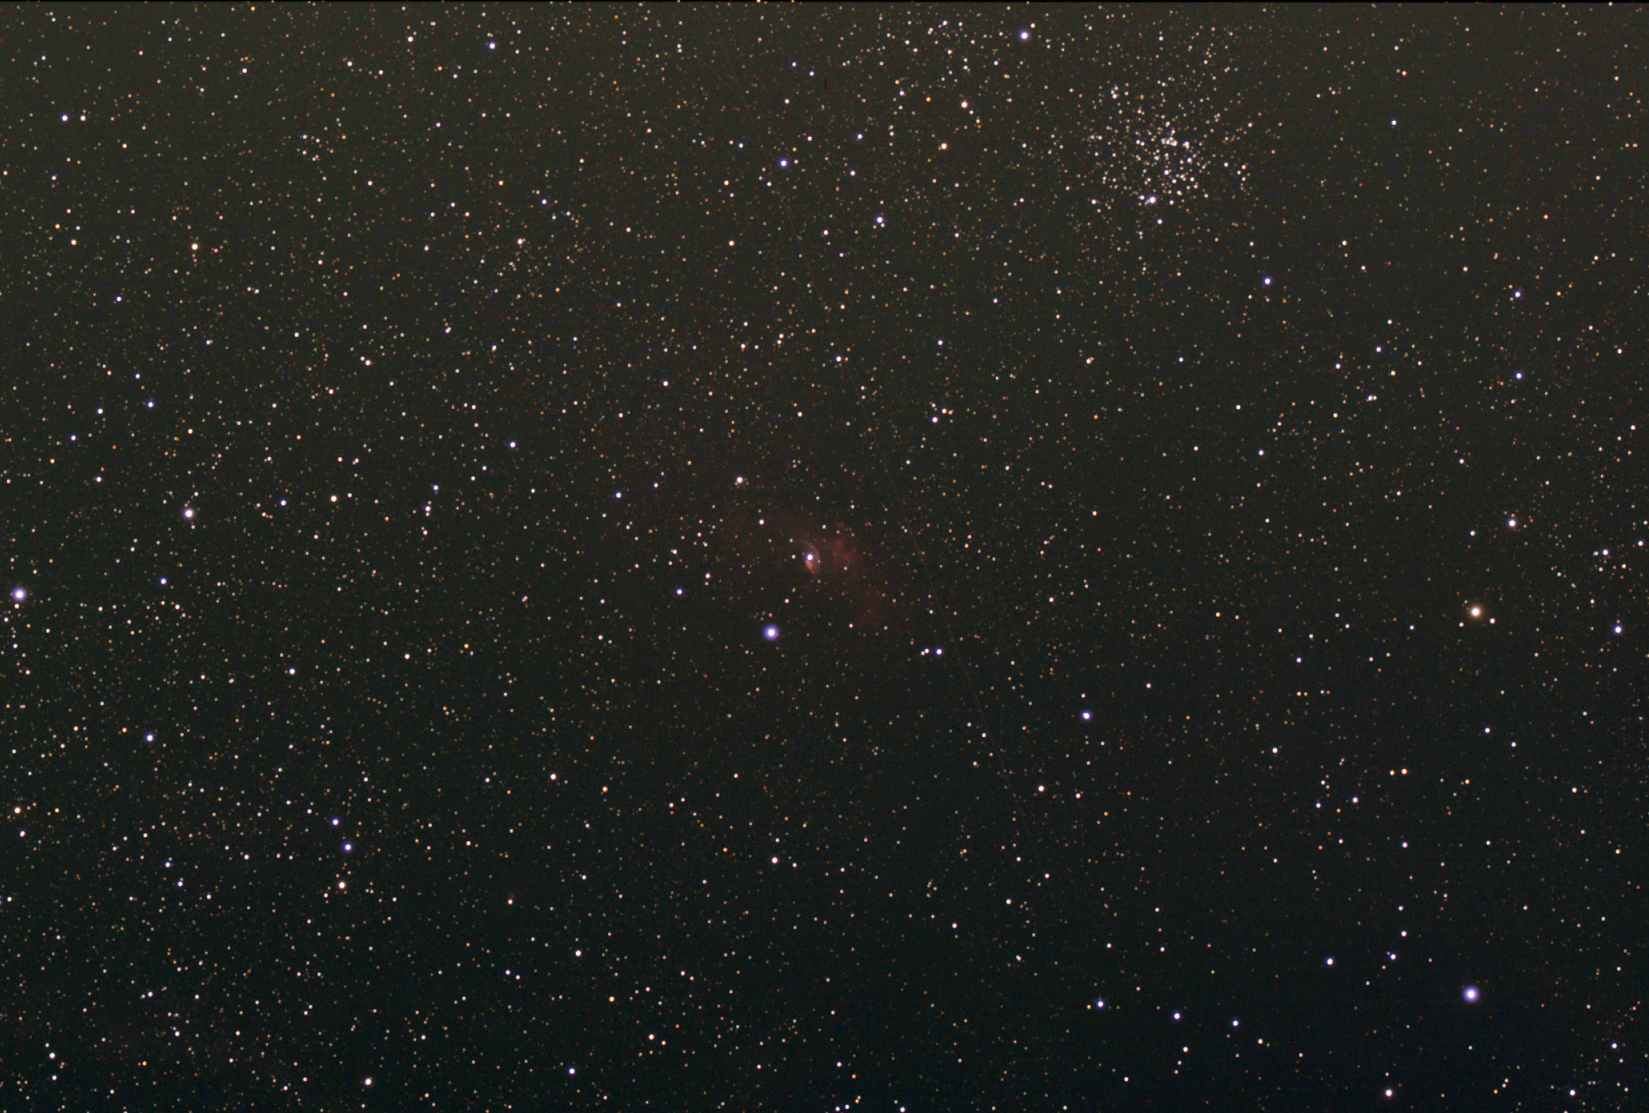
During the 09/16/2022 EAA session I also EAA observed the Bubble Nebula, NGC 7635. This is the SharpCap Pro live stack of the Bubble Nebula saved from the EAA session.
This was one of my favorites of the EAA observing session and it was the first time observing the Bubble Nebula. The open cluster M52 is also visible in the top right quadrant of the frame.
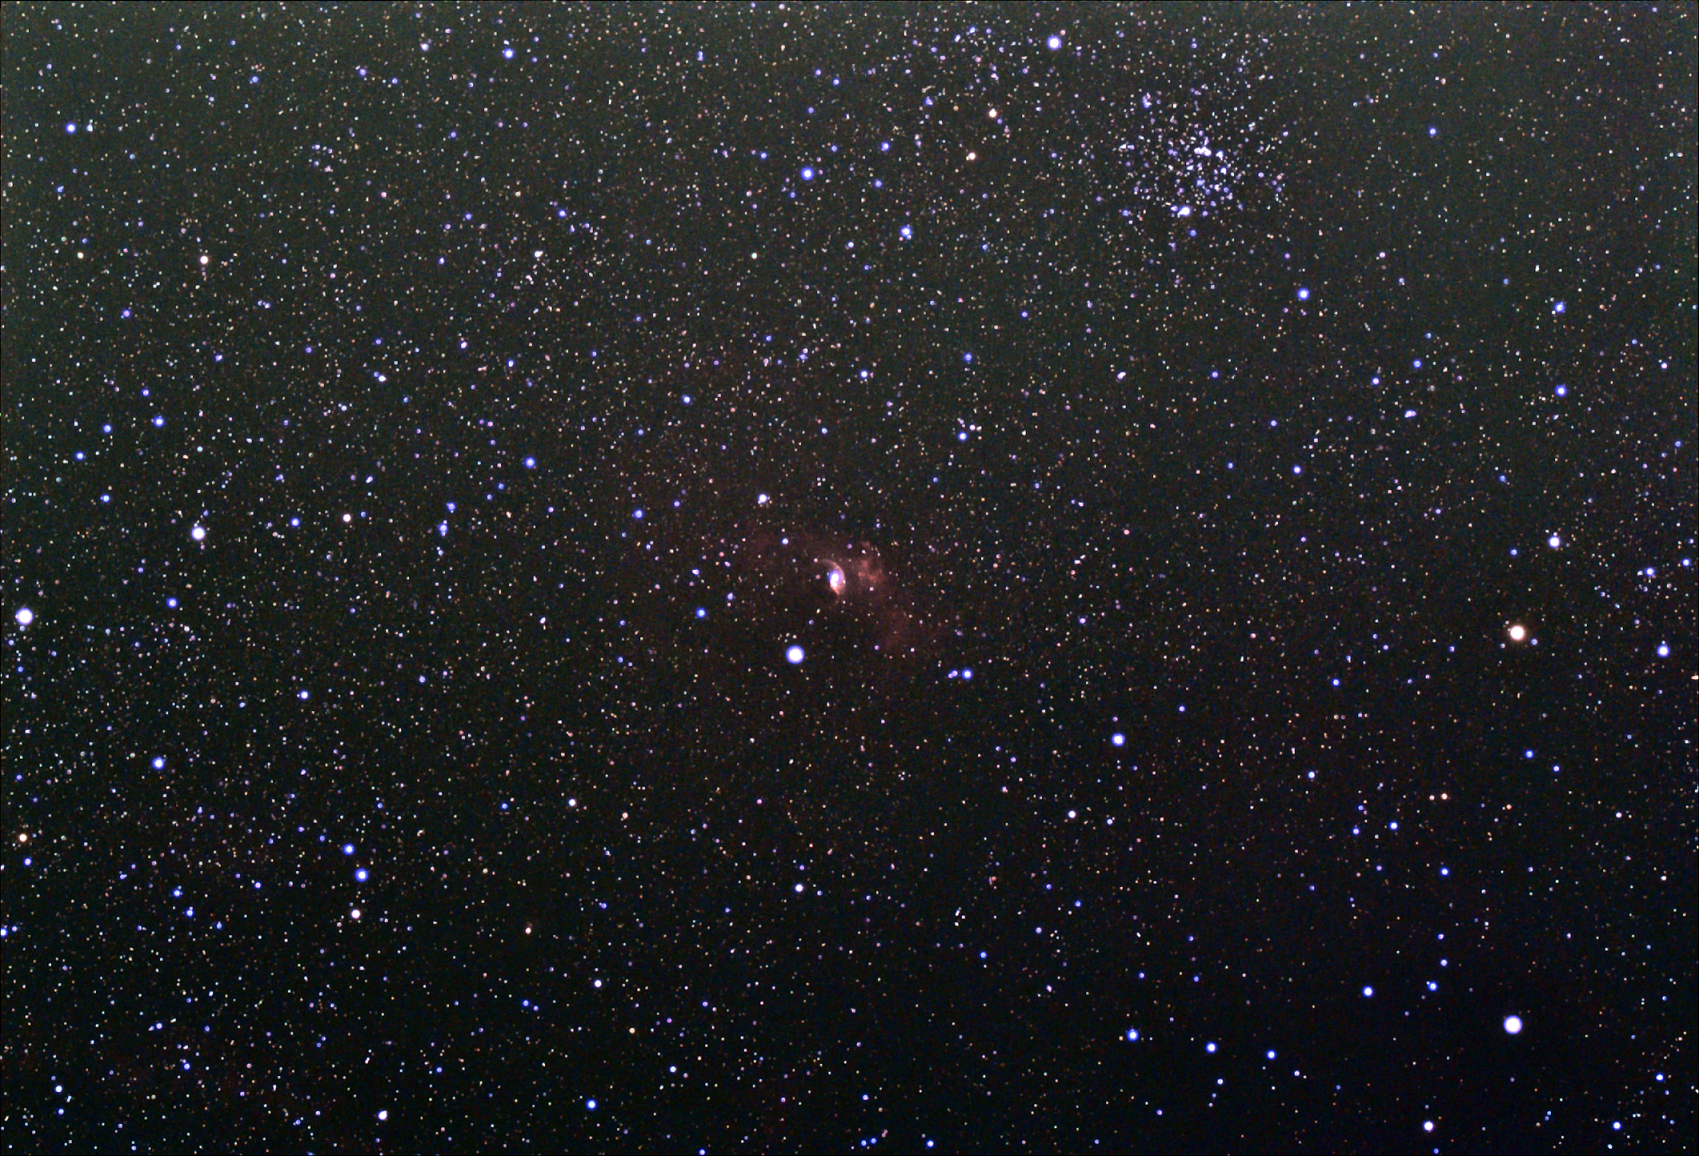
For the Bubble Nebula I followed the same basic process as I used to post-process M31. I stacked the NGC 7635 FITS captures in DSS, saved the stack as a TIFF, opened the TIFF in GIMP, and edited the color levels and curves, then exported the processed image to PNG.
After a bit of editing and processing in GIMP the Bubble Nebula really pops out. It looks pretty nice in the EAA live stack capture but there is definitely a lot more detail to be seen after a few minutes of adjustments to the color levels and curves in GIMP.
Not only is there more detail in the Bubble Nebula, but M52 also looks pretty good even though some of the stars are showing a bit more blue than I would like. Again need to keep practicing, but happy with these initial results and I learned a lot about the basics in GIMP. I am starting to see how astrophotographers get the high-contrast details to create their beautiful images.
This very limited and extremely basic post-processing exercise was just to learn a little more about what is possible, and I learned a lot. EAA will continue to be my primary method of observing, but after seeing what is possible I will likely continue to practice post-processing some of my EAA captures in order to observe more details (also this will give me something to do on cloudy nights).
Here is another GIMP astrophotography image processing tutorial I came across that gets a little more advanced with some layers and star masks and such. I have not dug very deep into this yet, but I am looking forward to try out some of these techniques.
I’ll keep practicing to continue to learn new techniques and develop new image processing skills. I might dedicate some time to doing some longer exposure sessions to create some astrophotography images. There is still so much more to learn.