Exploring the Suffolk Virginia Night Sky – Astronomy, Astrophotography, Telescopes, EAA – Planets and Stars and Nebula and Galaxies – Looking, Learning, Sharing… Let's see what we can see…
Weather has been pretty crappy, looks like our next chance for clear skies is on Tuesday. Hope to get a bit of time on Goofi’s February 2024 challenge, IC 434 (the Horsehead Nebula) when the sky clears up. With all the clouds and rain keeping me from collecting light in the scope I figured I would share how I use a great KStars feature, Flags. Flags allow you to mark an object in KStars to make it easy to find.
You can access flags a few different ways: From the menu Tools -> Flags, by right clicking on an object and selecting Add Flag, or by right clicking on an exiting flag and selecting Edit Flag. In the Flag Manager you can add a new flag or edit and existing flag by adding or editing the Right ascension (RA), Declination (DEC), Epoch, add a custom Label, set a Label color, and add an Icon.
If you access the Flag Manager by right clicking an object (or existing Flag) to add or edit a Flag on the KStars map the RA and DEC will be populated for the object you selected. From the Flag Manager you can also select a Flag and Center in Map or Center in Telescope. If you are no longer using a flag you can Delete it.
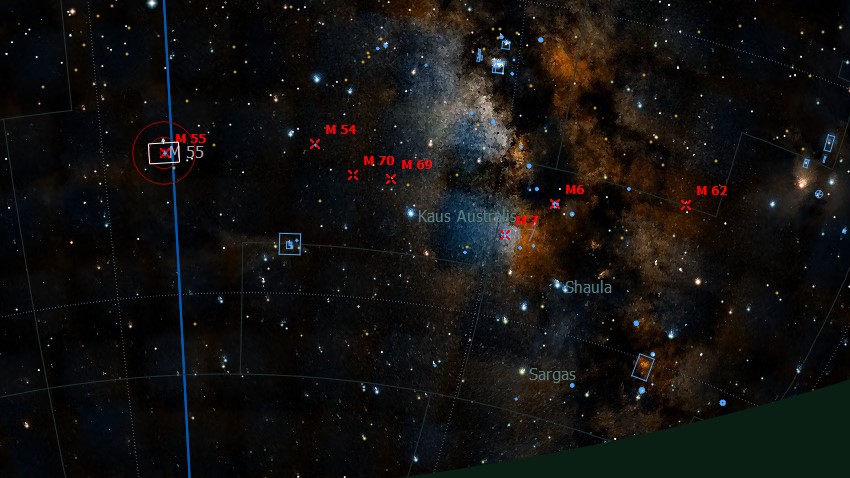
Flags make it much easier to find targets on the KStars map. Unlike other labels, flags are visible at any zoom. For example I have created flags for the remaining Messier objects I need to complete my Messier log. This way I can easily see when these flagged objects are above my horizon.
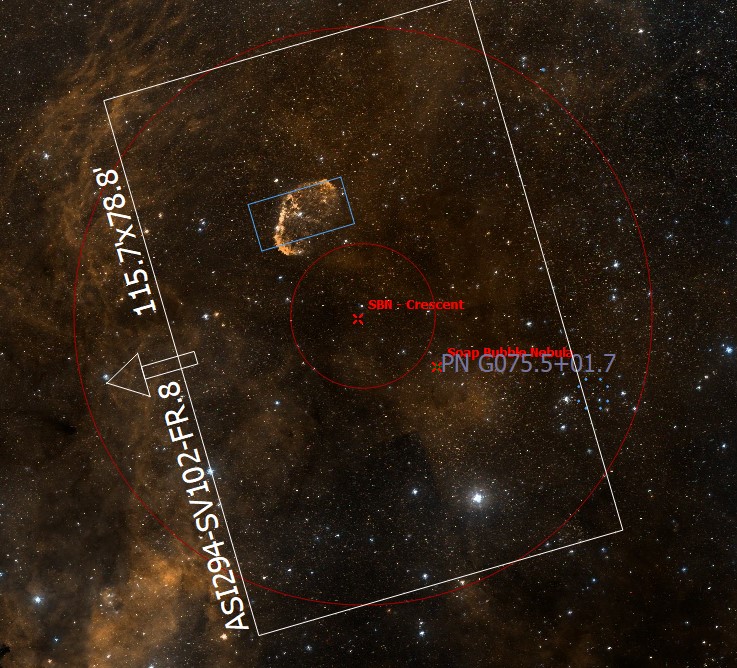
Another way I use flags is to help frame objects. In the example below I set a flag between the Crescent Nebula (NGC 6888) and the Soap Bubble Nebula so I am able to easily return to a point where both should be framed with-in the FOV of my scope.
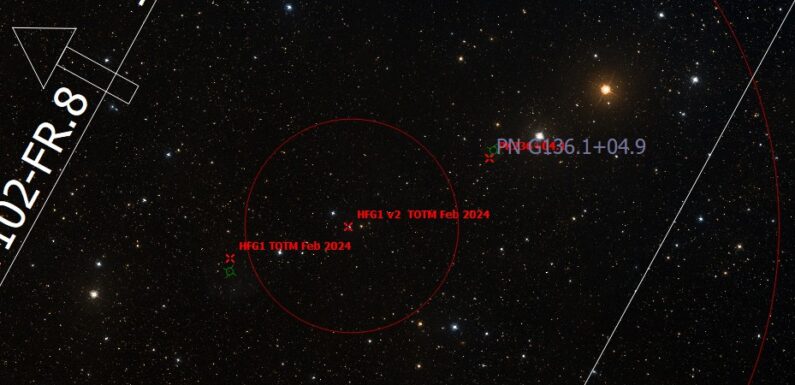
I used flags this way to frame Planetary Nebula PK 136+05 and PN G136.1+04.9 recently.
Adding Custom Flag Icons
To add custom icons to the KStars Flag Manager create a 10 x 10 pixel GIF or PNG (it may work with JPG and other image types, but I have only tested with GIF and PNG) and make sure the file name begins with flag (ie flag_star.gif). Keep the image kind of small (10×10, 15×15 or so) as it will display actual size on map. Then add the image to your users’ AppData\Local\kstars directory (if you are using Windows). Restart KStars and the new icon should be available to assign to a Flag.
Flags are a simple but very useful features to help you find objects and plan your observing sessions.
KStars/Ekos is an open-source planetarium and observatory control software built using the KDE Frameworks. It is available for Linux, BSD, macOS, and Microsoft Windows. You can download KStars here.